Meet the new dashboard
We’ve redesigned the Checkbook dashboard to make sending and tracking payments simpler. Every way to send a payment now lives on a single screen, every payment shows up in one history, and your settings have a dedicated home.
Pages load faster and search is quicker, particularly for accounts with large transaction volumes. Beyond that, the interface has been refreshed throughout — clearer navigation, more consistent screens, and better feedback if something goes wrong.
What hasn’t changed
- API integrations and webhooks work exactly as before
- All existing data carries over: account details, users, contacts, and payment history
- Sign-in URLs and credentials are the same
What’s changed
Security
Sign in with OIDC
Checkbook now supports OpenID Connect (OIDC) Single Sign-On (SSO), so users can access the Checkbook platform using their existing corporate credentials. This is supported alongside SAML SSO, and covers Relying Party (RP)-initiated SSO, Third-Party (IdP)-initiated SSO, and Just-In-Time (JIT) provisioning. See OIDC Single Sign-On for more information.
MFA for authorized users
Authorized users are now required to protect their accounts with multi-factor authentication (MFA). Until then, they can’t switch into the accounts they’ve been granted access to.
Page organization
We’ve reworked how content is organized across the dashboard. Duplicate pages have been consolidated, related tasks now sit together, and settings have moved out of the main navigation into an area of their own. The two biggest changes are summarized below, followed by a page-by-page walkthrough of the changes.
Unified payouts
Every way to send money now starts from one screen. Paying a single recipient, uploading a batch, sending multi-party payments, and sending on behalf of a marketplace user all begin at Payments › Send payment. Previously, each was its own page, duplicated again under marketplace users.
One payment history
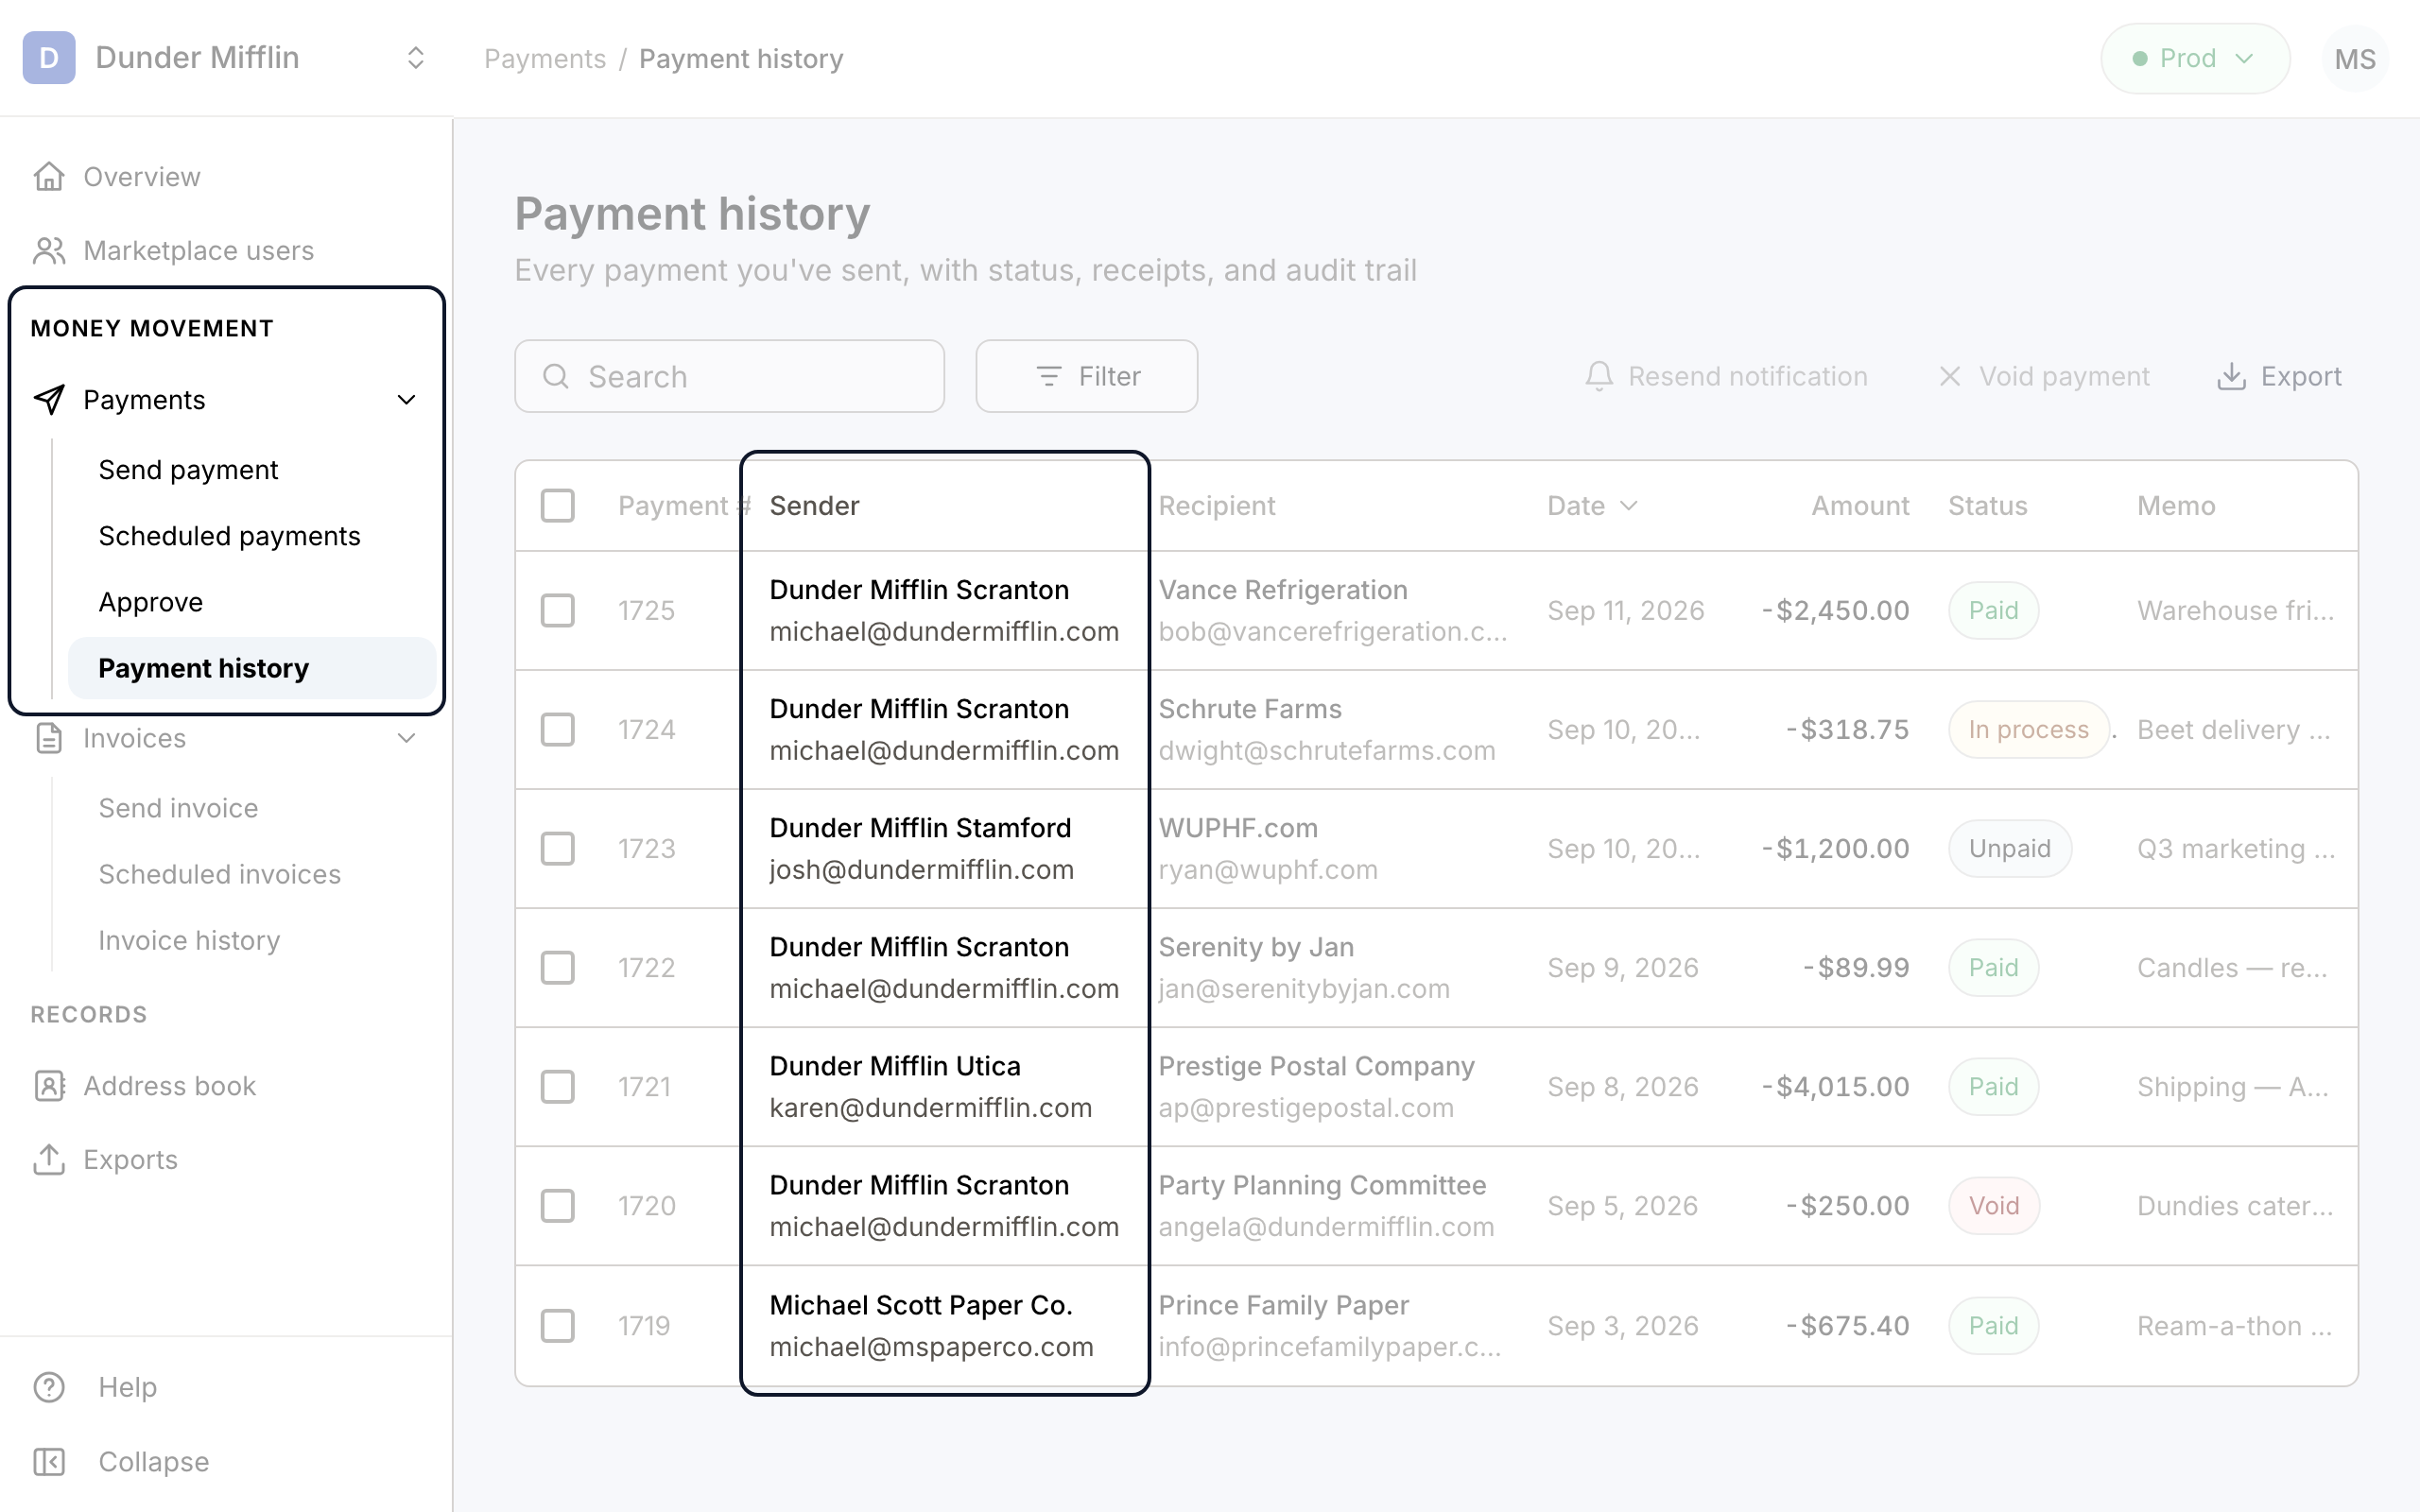
All payment activity now appears in a single history at Payments › Payment history, including payments sent by marketplace users. Previously, every send screen carried its own copy of the history table, and marketplace activity was tracked in a separate list.
Page by page
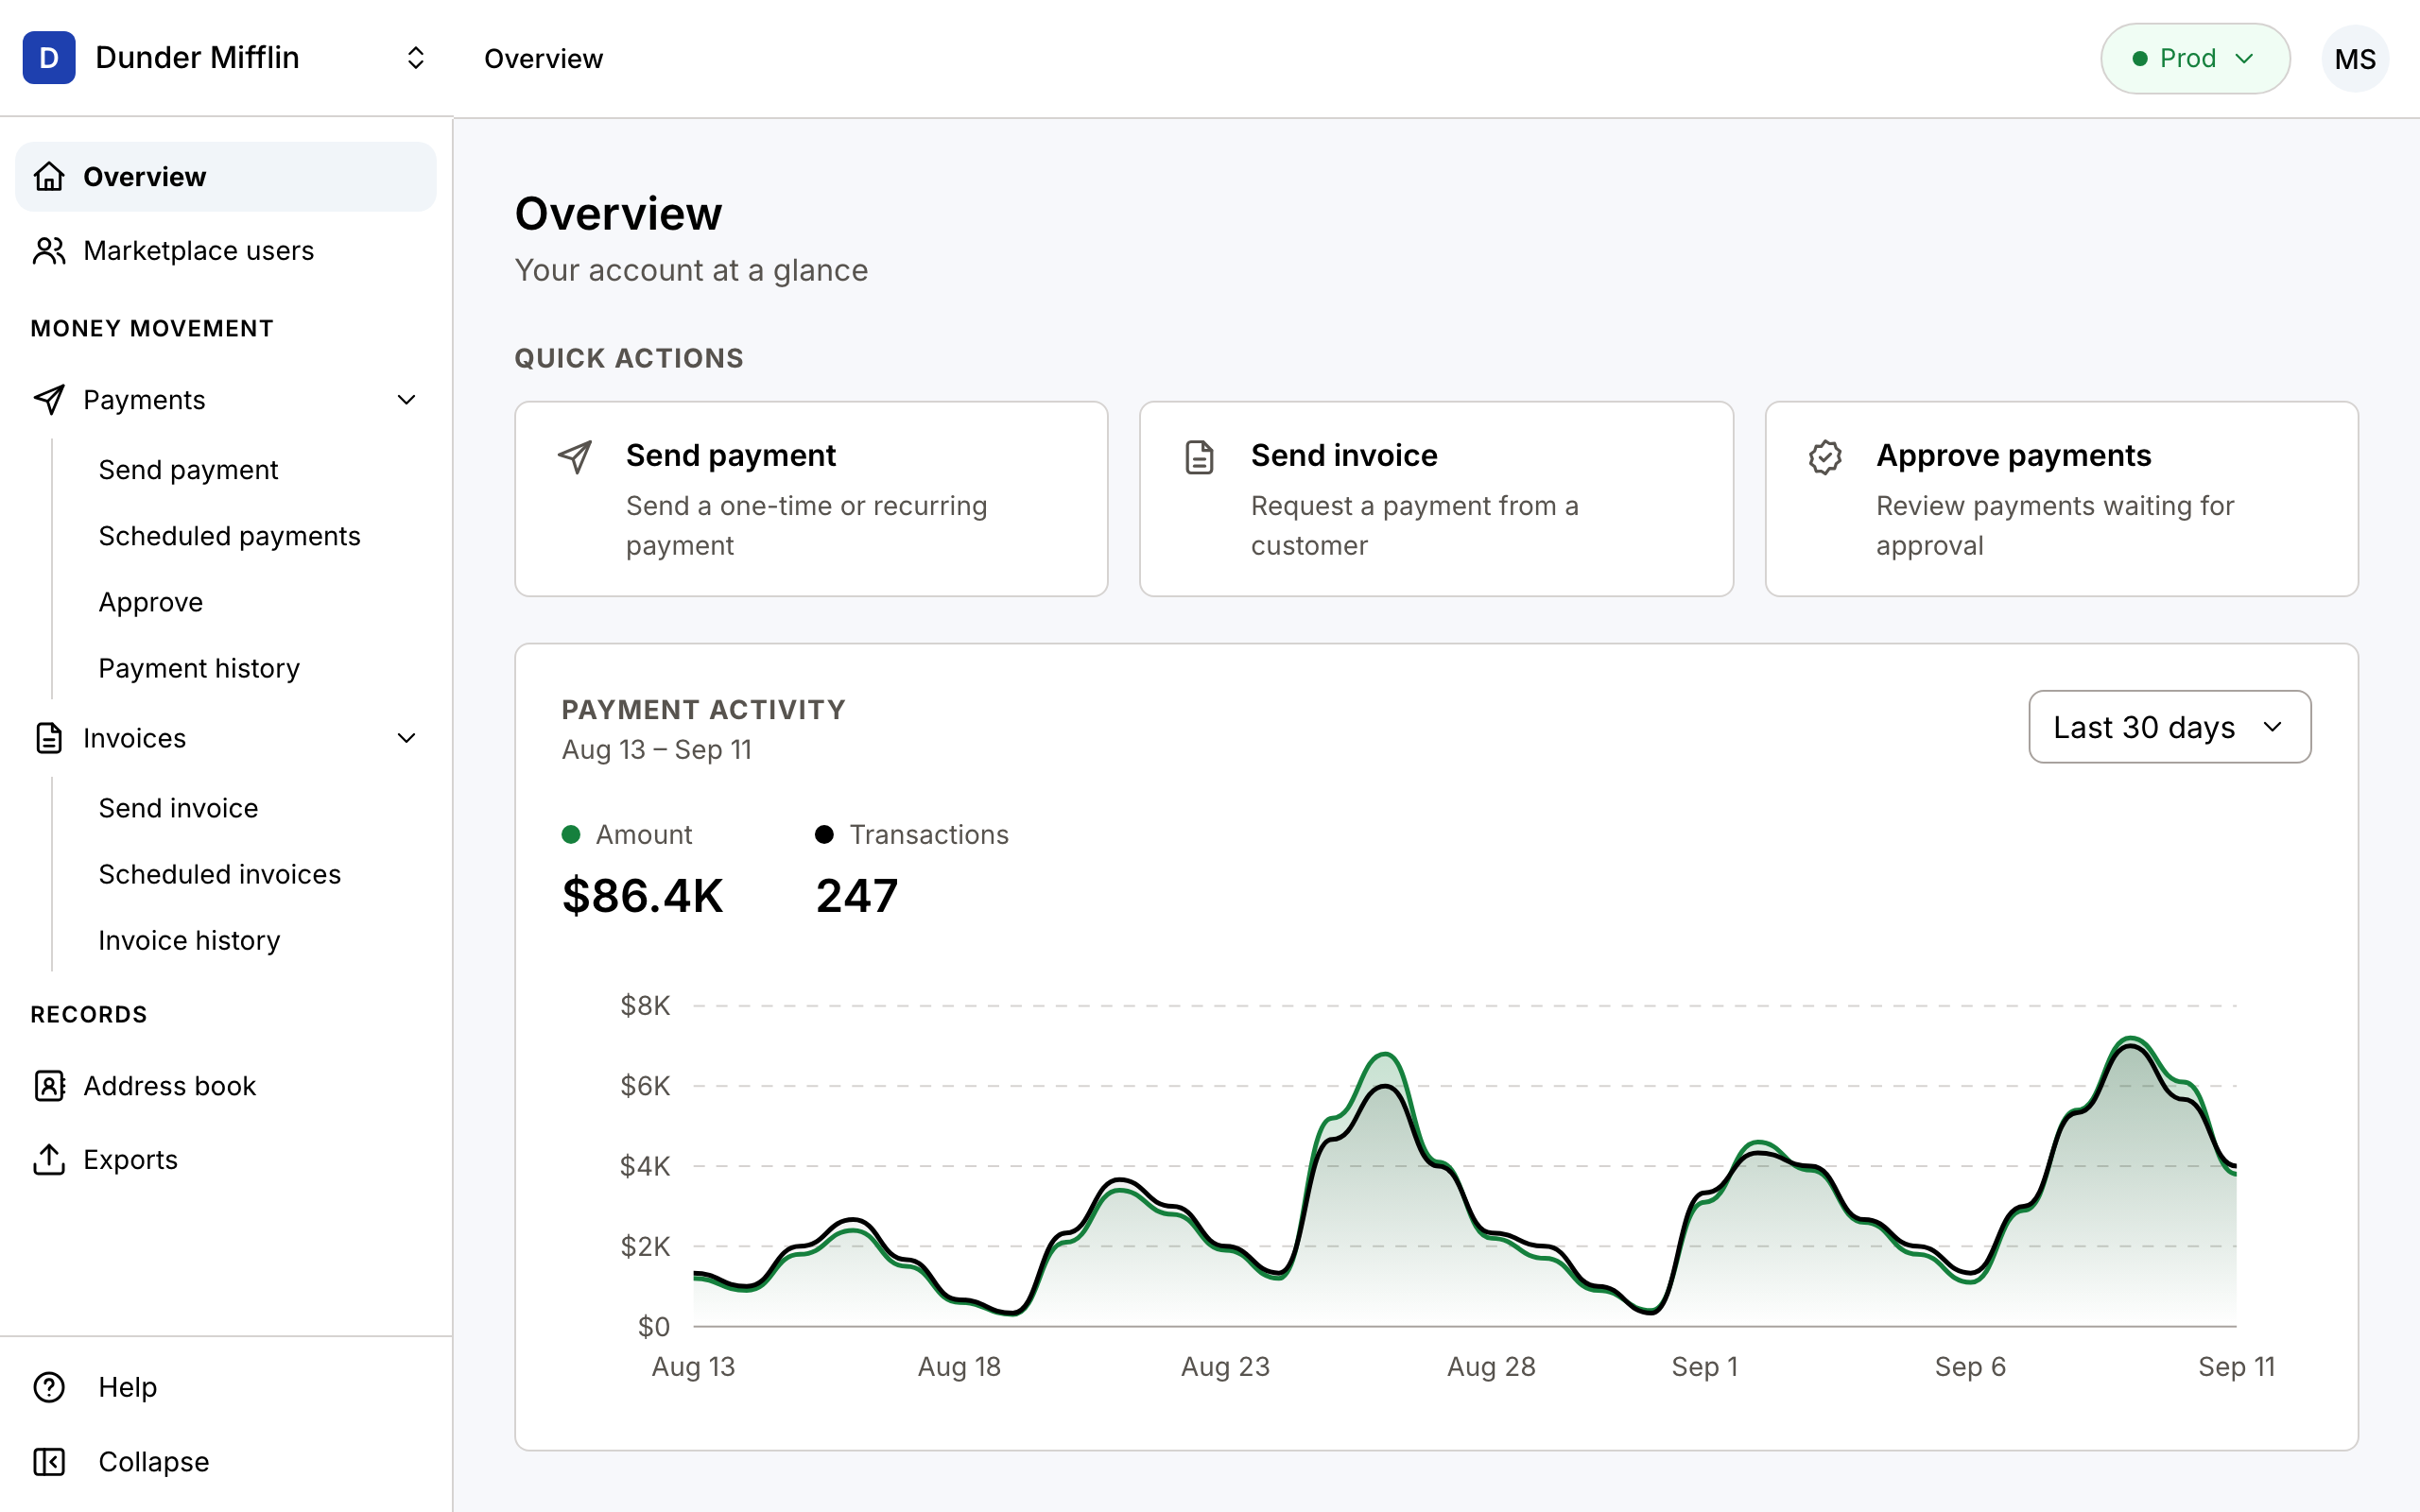
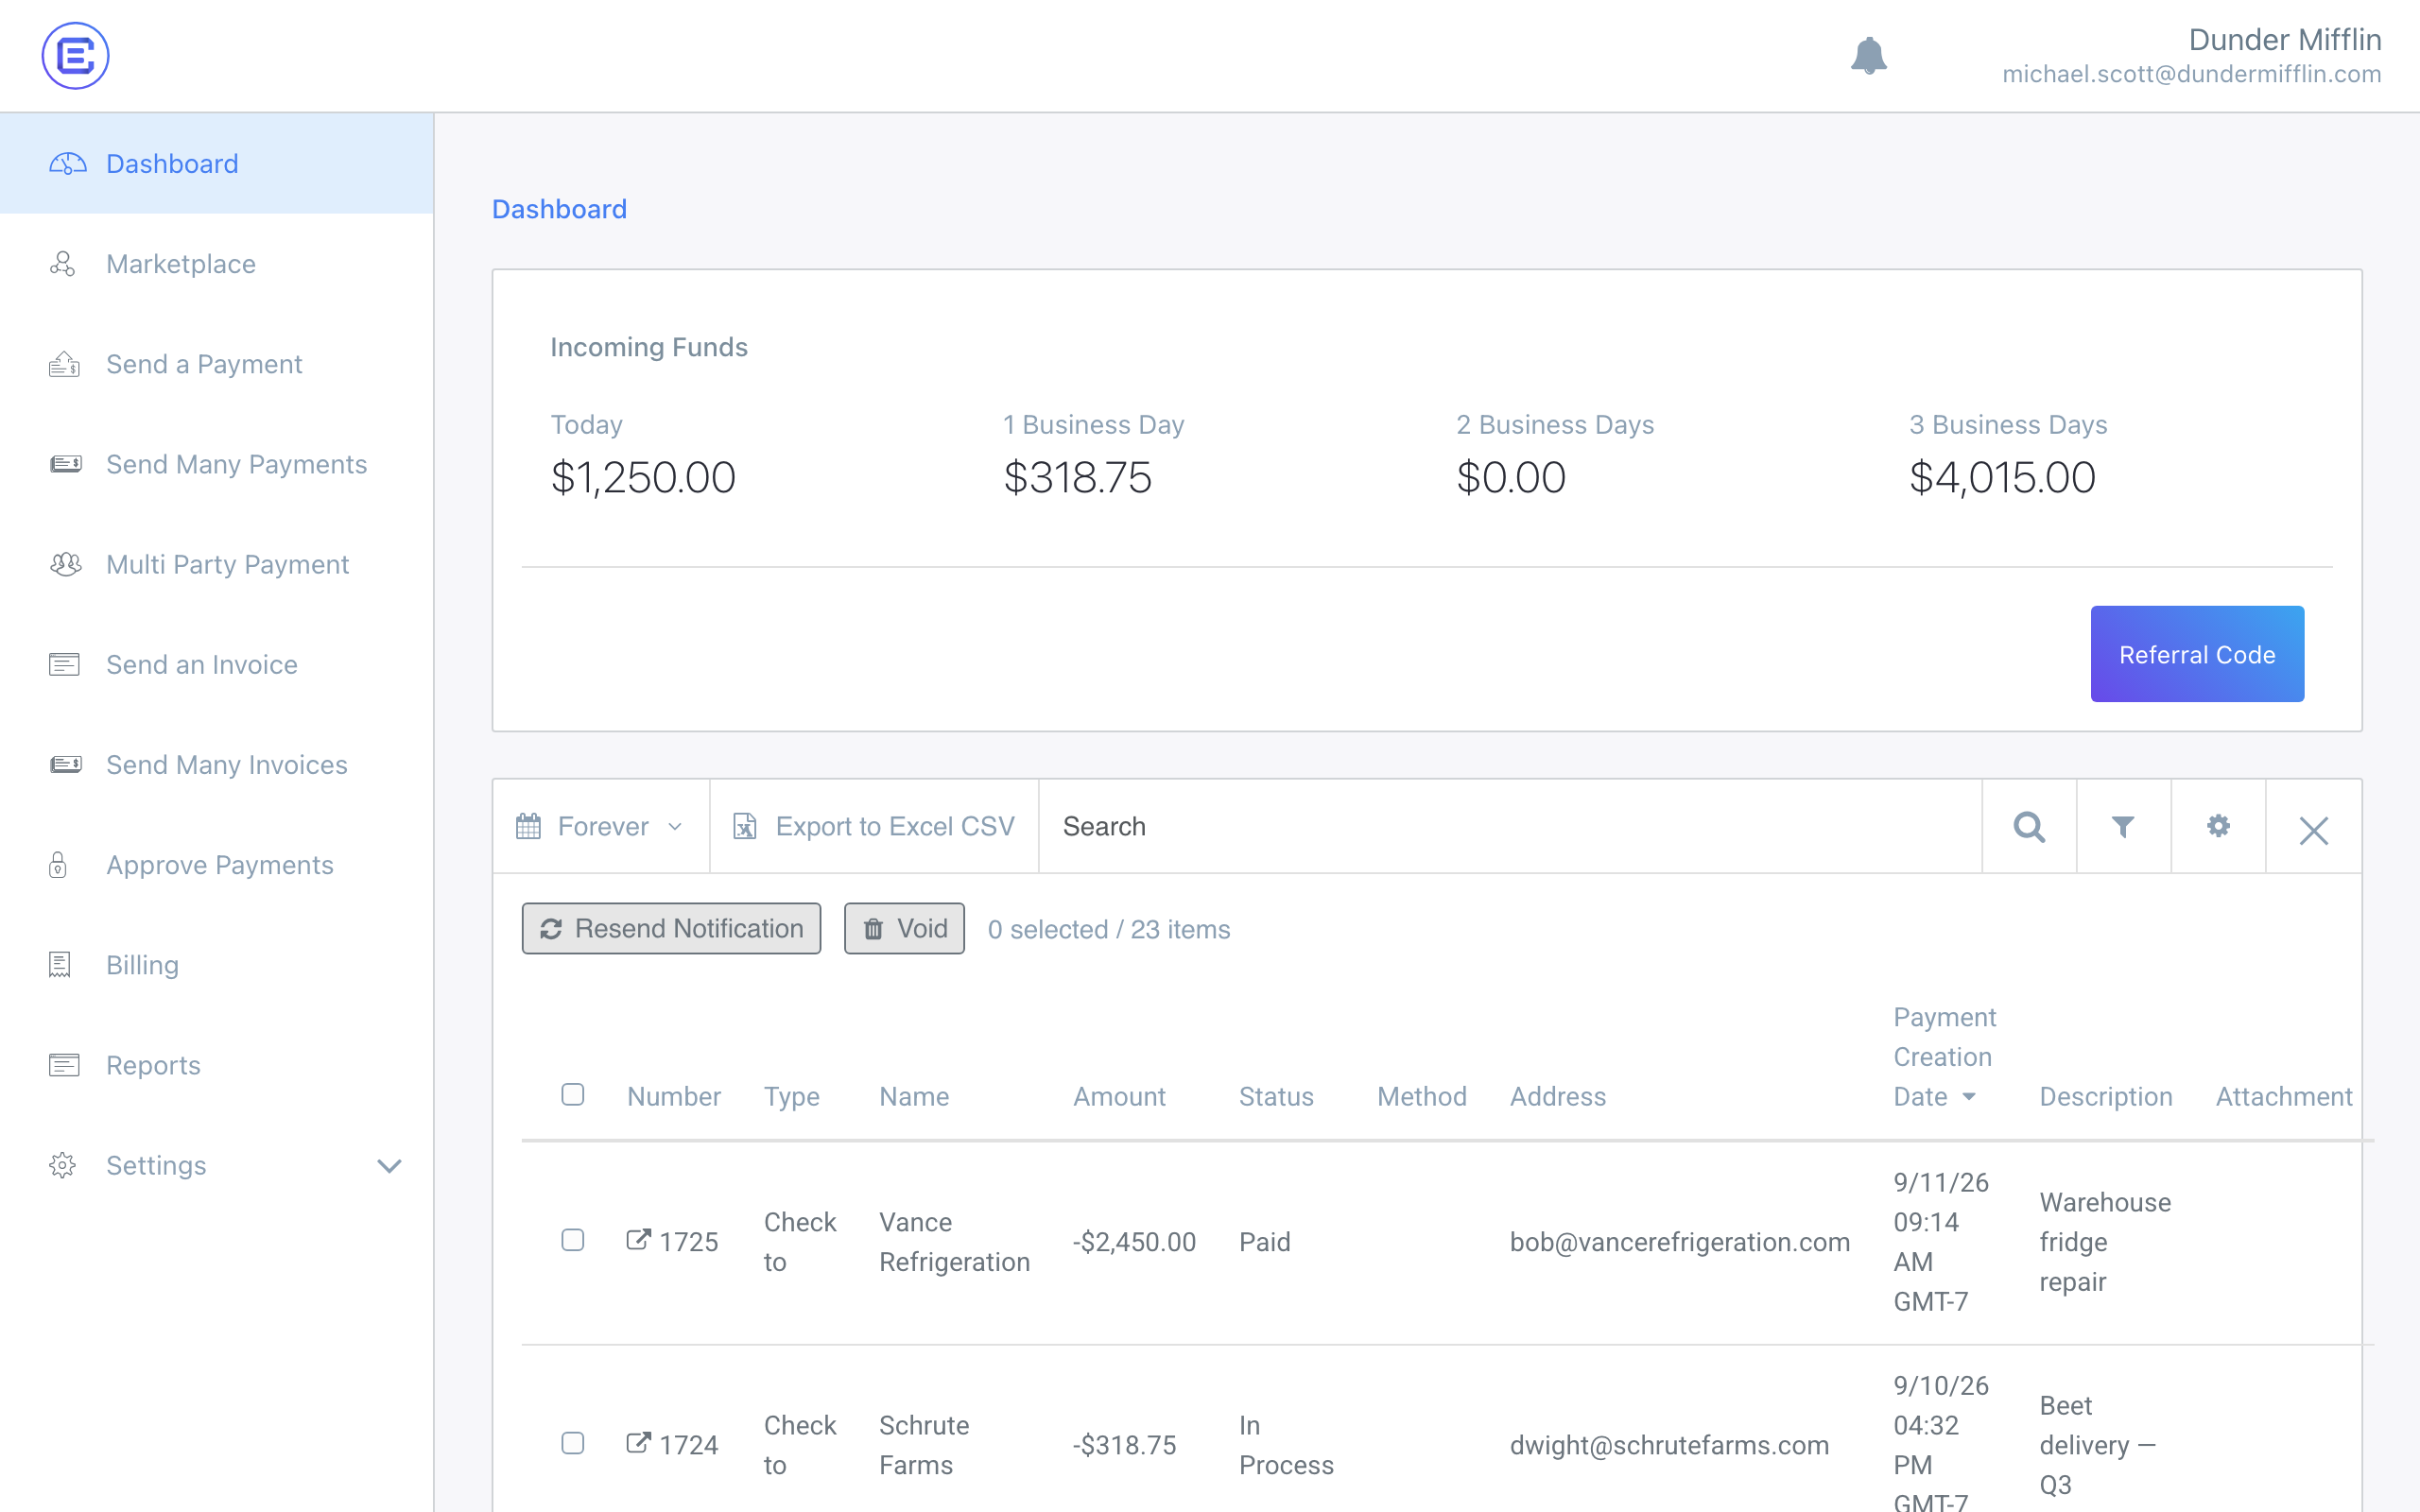
Overview
What it was: Previously Dashboard — an incoming-funds summary and another copy of the payment history table.
What changed: The history table is gone from this screen; it now lives at Payments › Payment history In its place, quick actions are one click away, and payment activity is charted over a date range you choose.
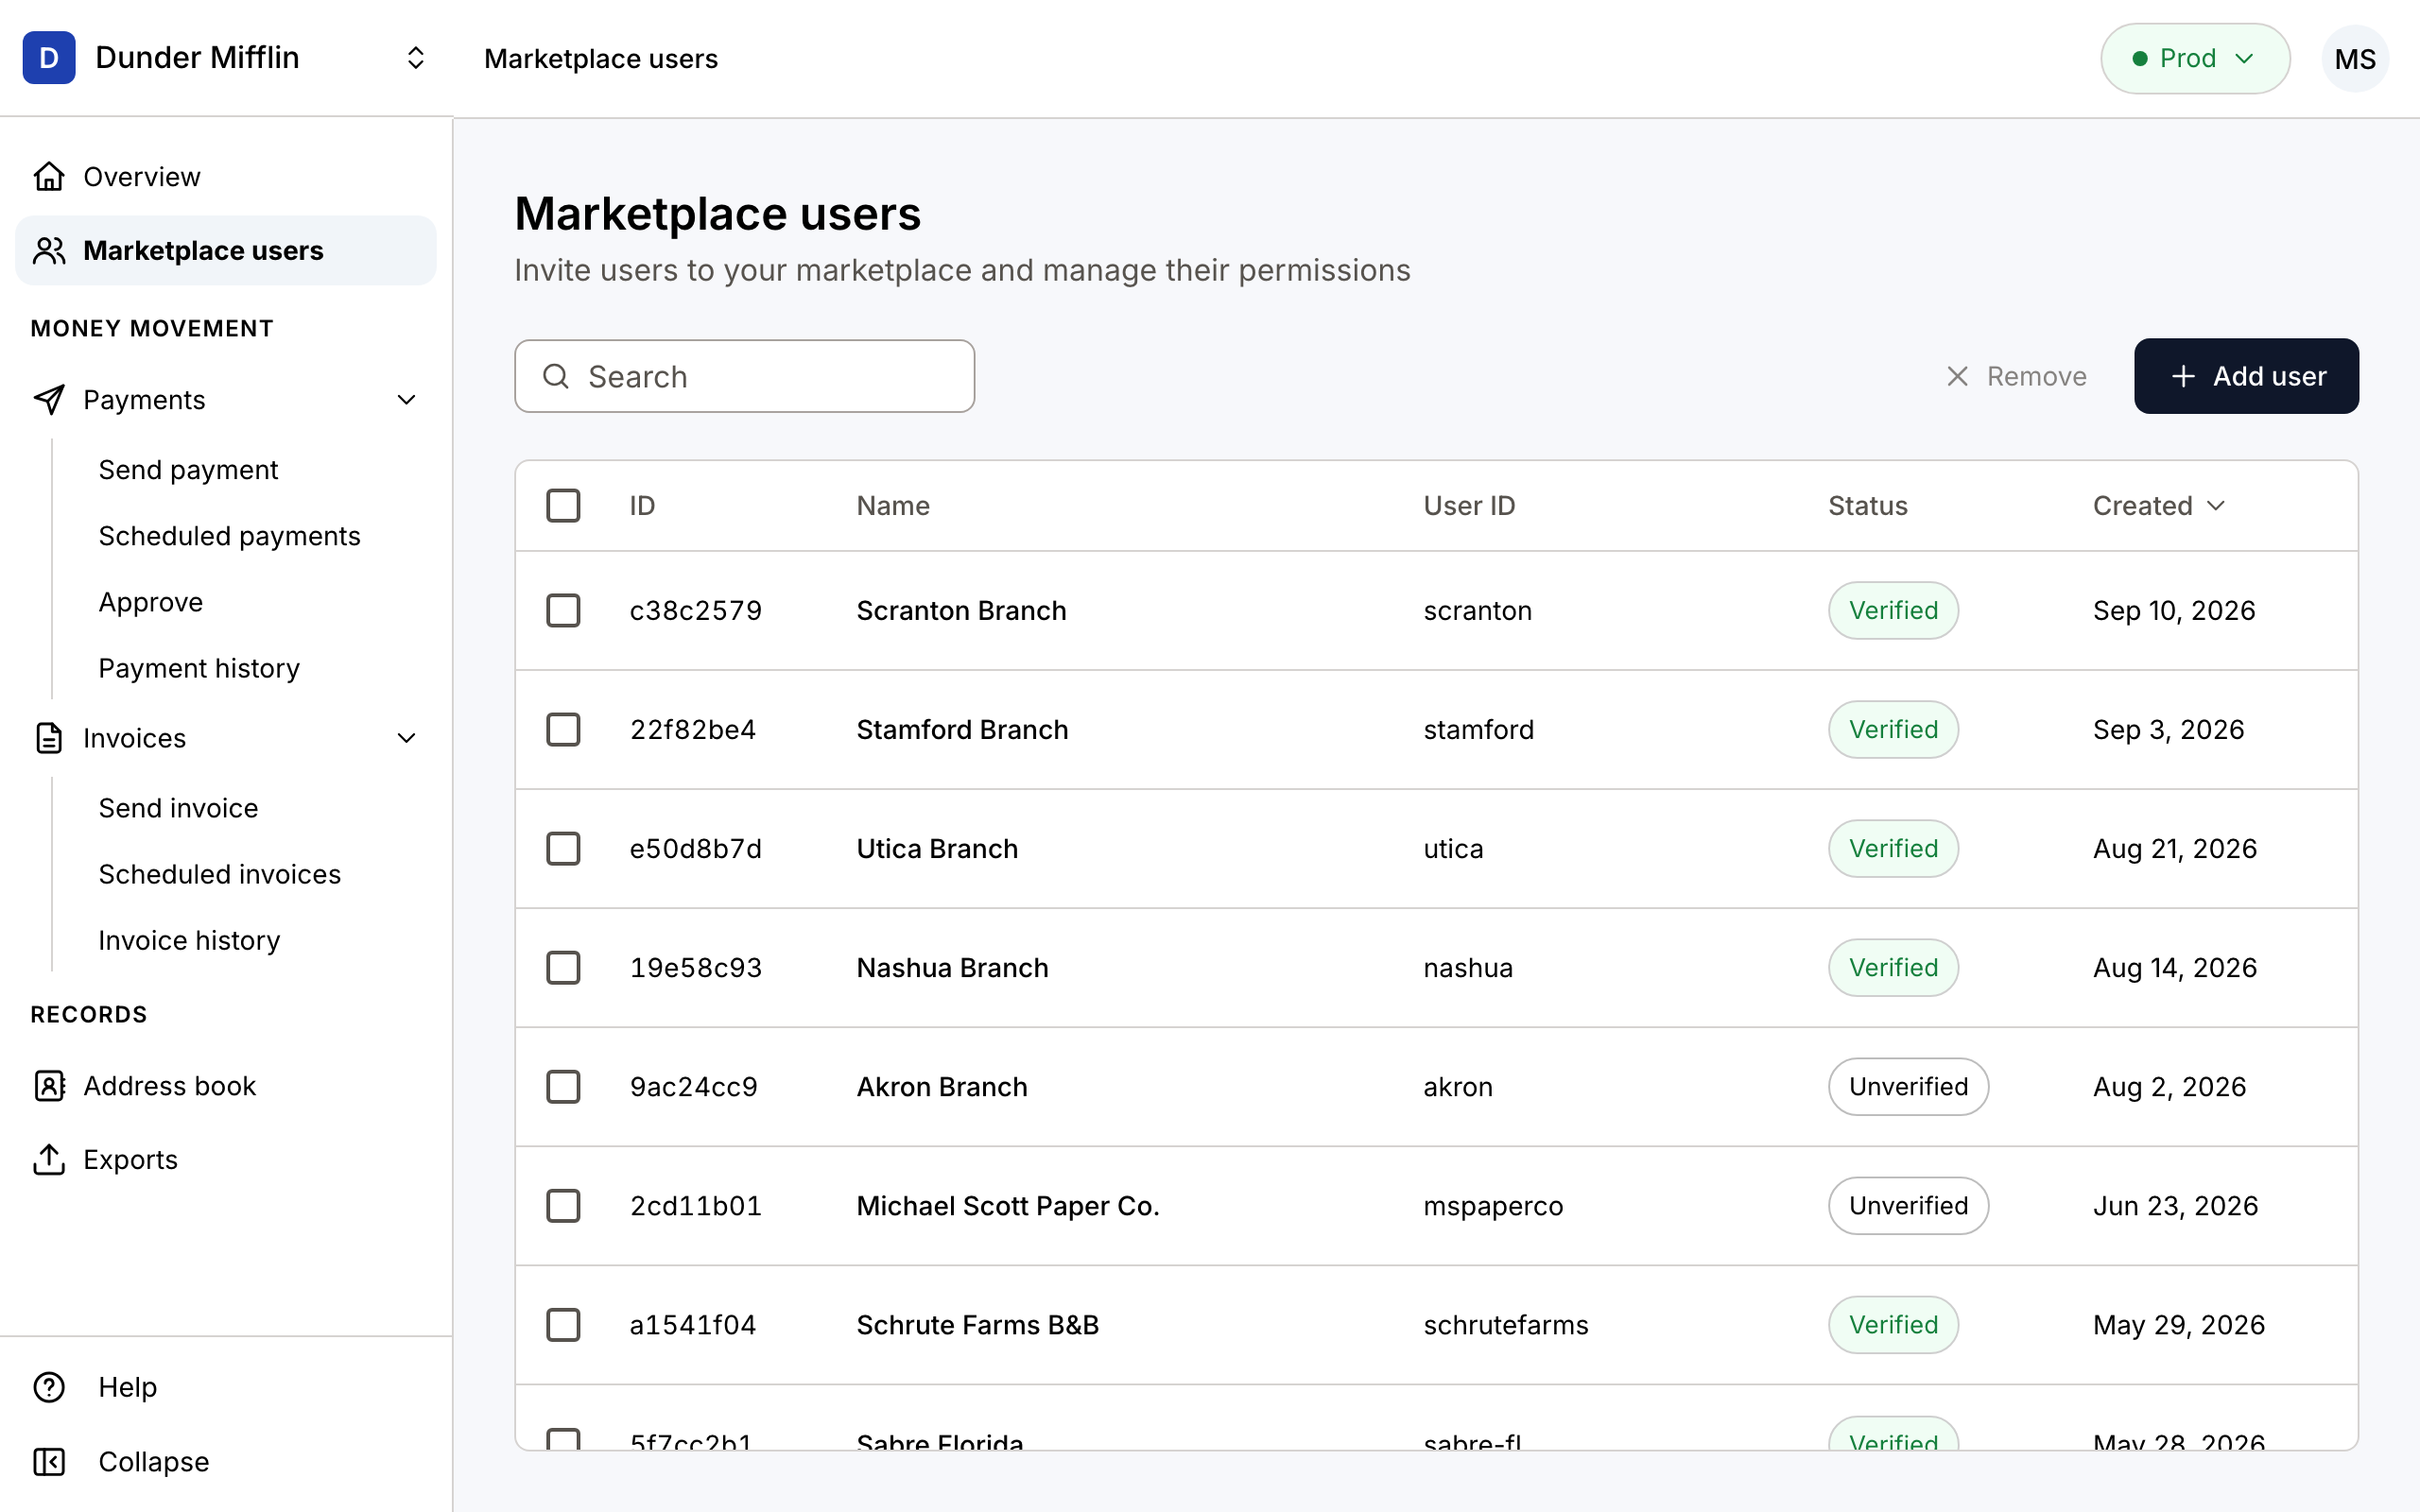
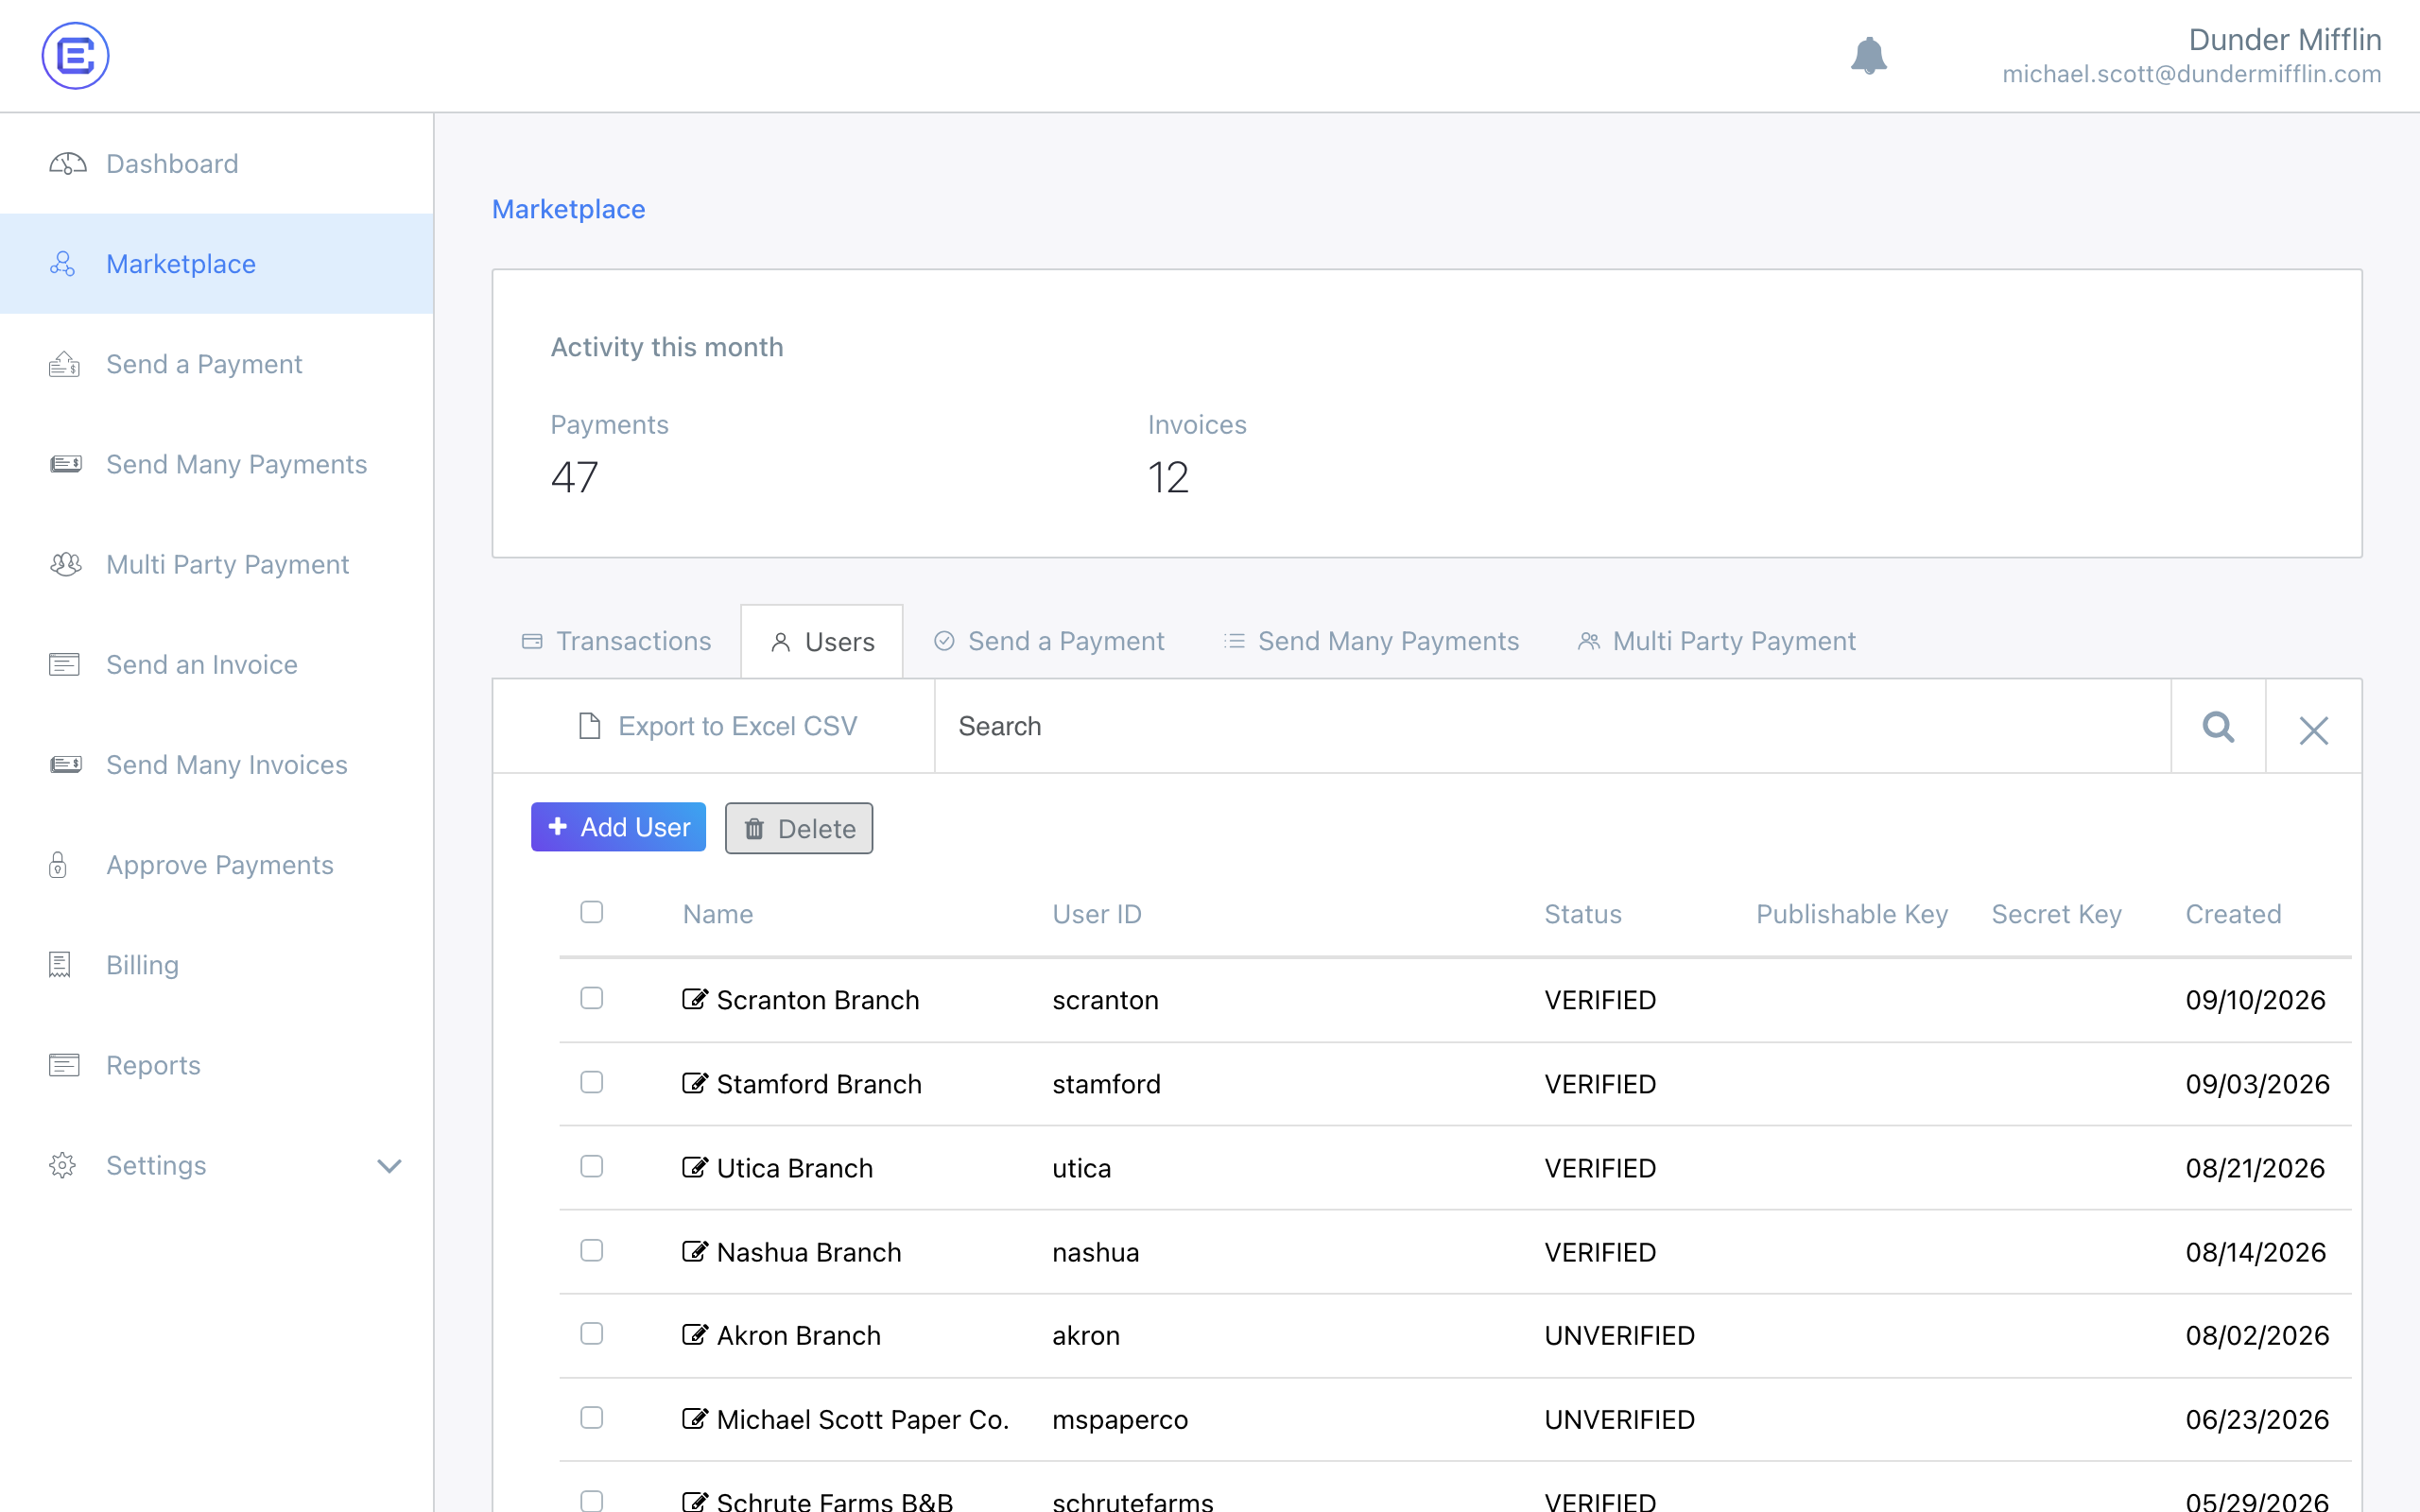
Marketplace users
What it was: Previously Marketplace — one page carrying six different jobs behind tabs: Transactions, Users, Send a Payment, Send Many Payments, and Multi Party Payment.
What changed: The page is now Marketplace users, and is purely for managing those users. All the sending and transaction tabs moved into the unified payments views, which leaves the user record focused on profile, verification status, and settings. Onboarding a user is now a guided three-step flow — business details, owners and officers, then review and submit — with outstanding requirements surfaced on the user’s page.
Payments
Send payment
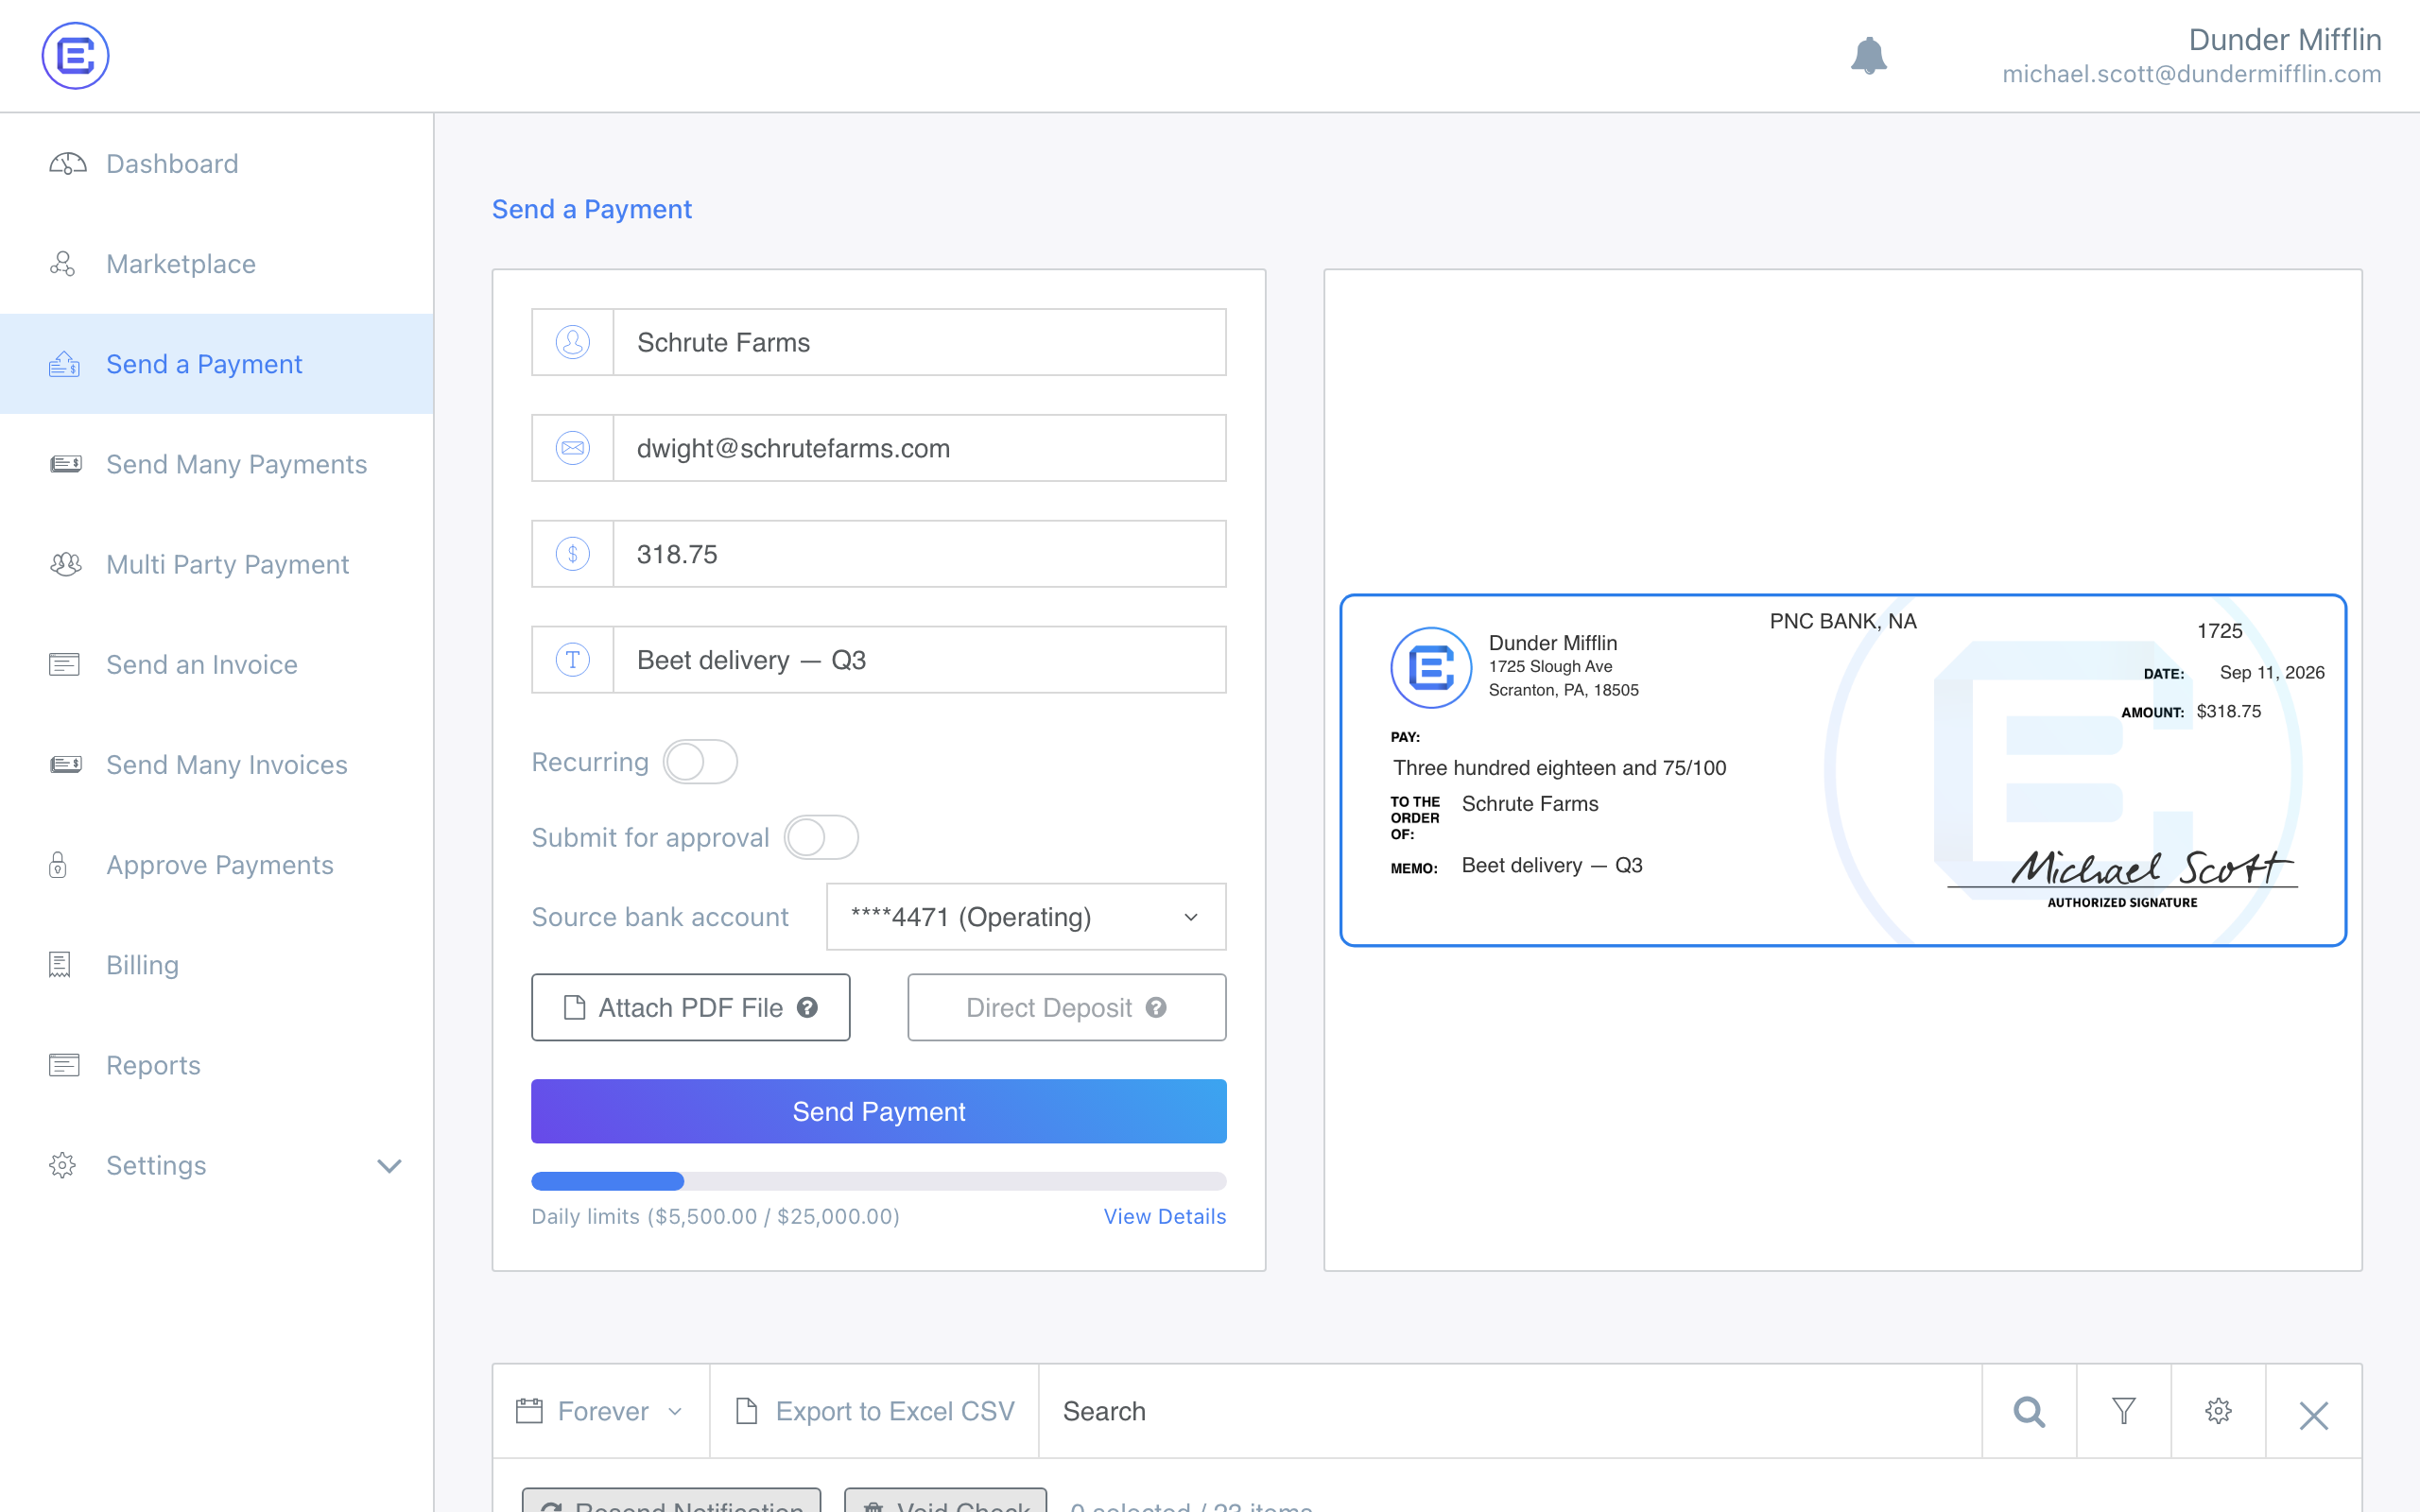
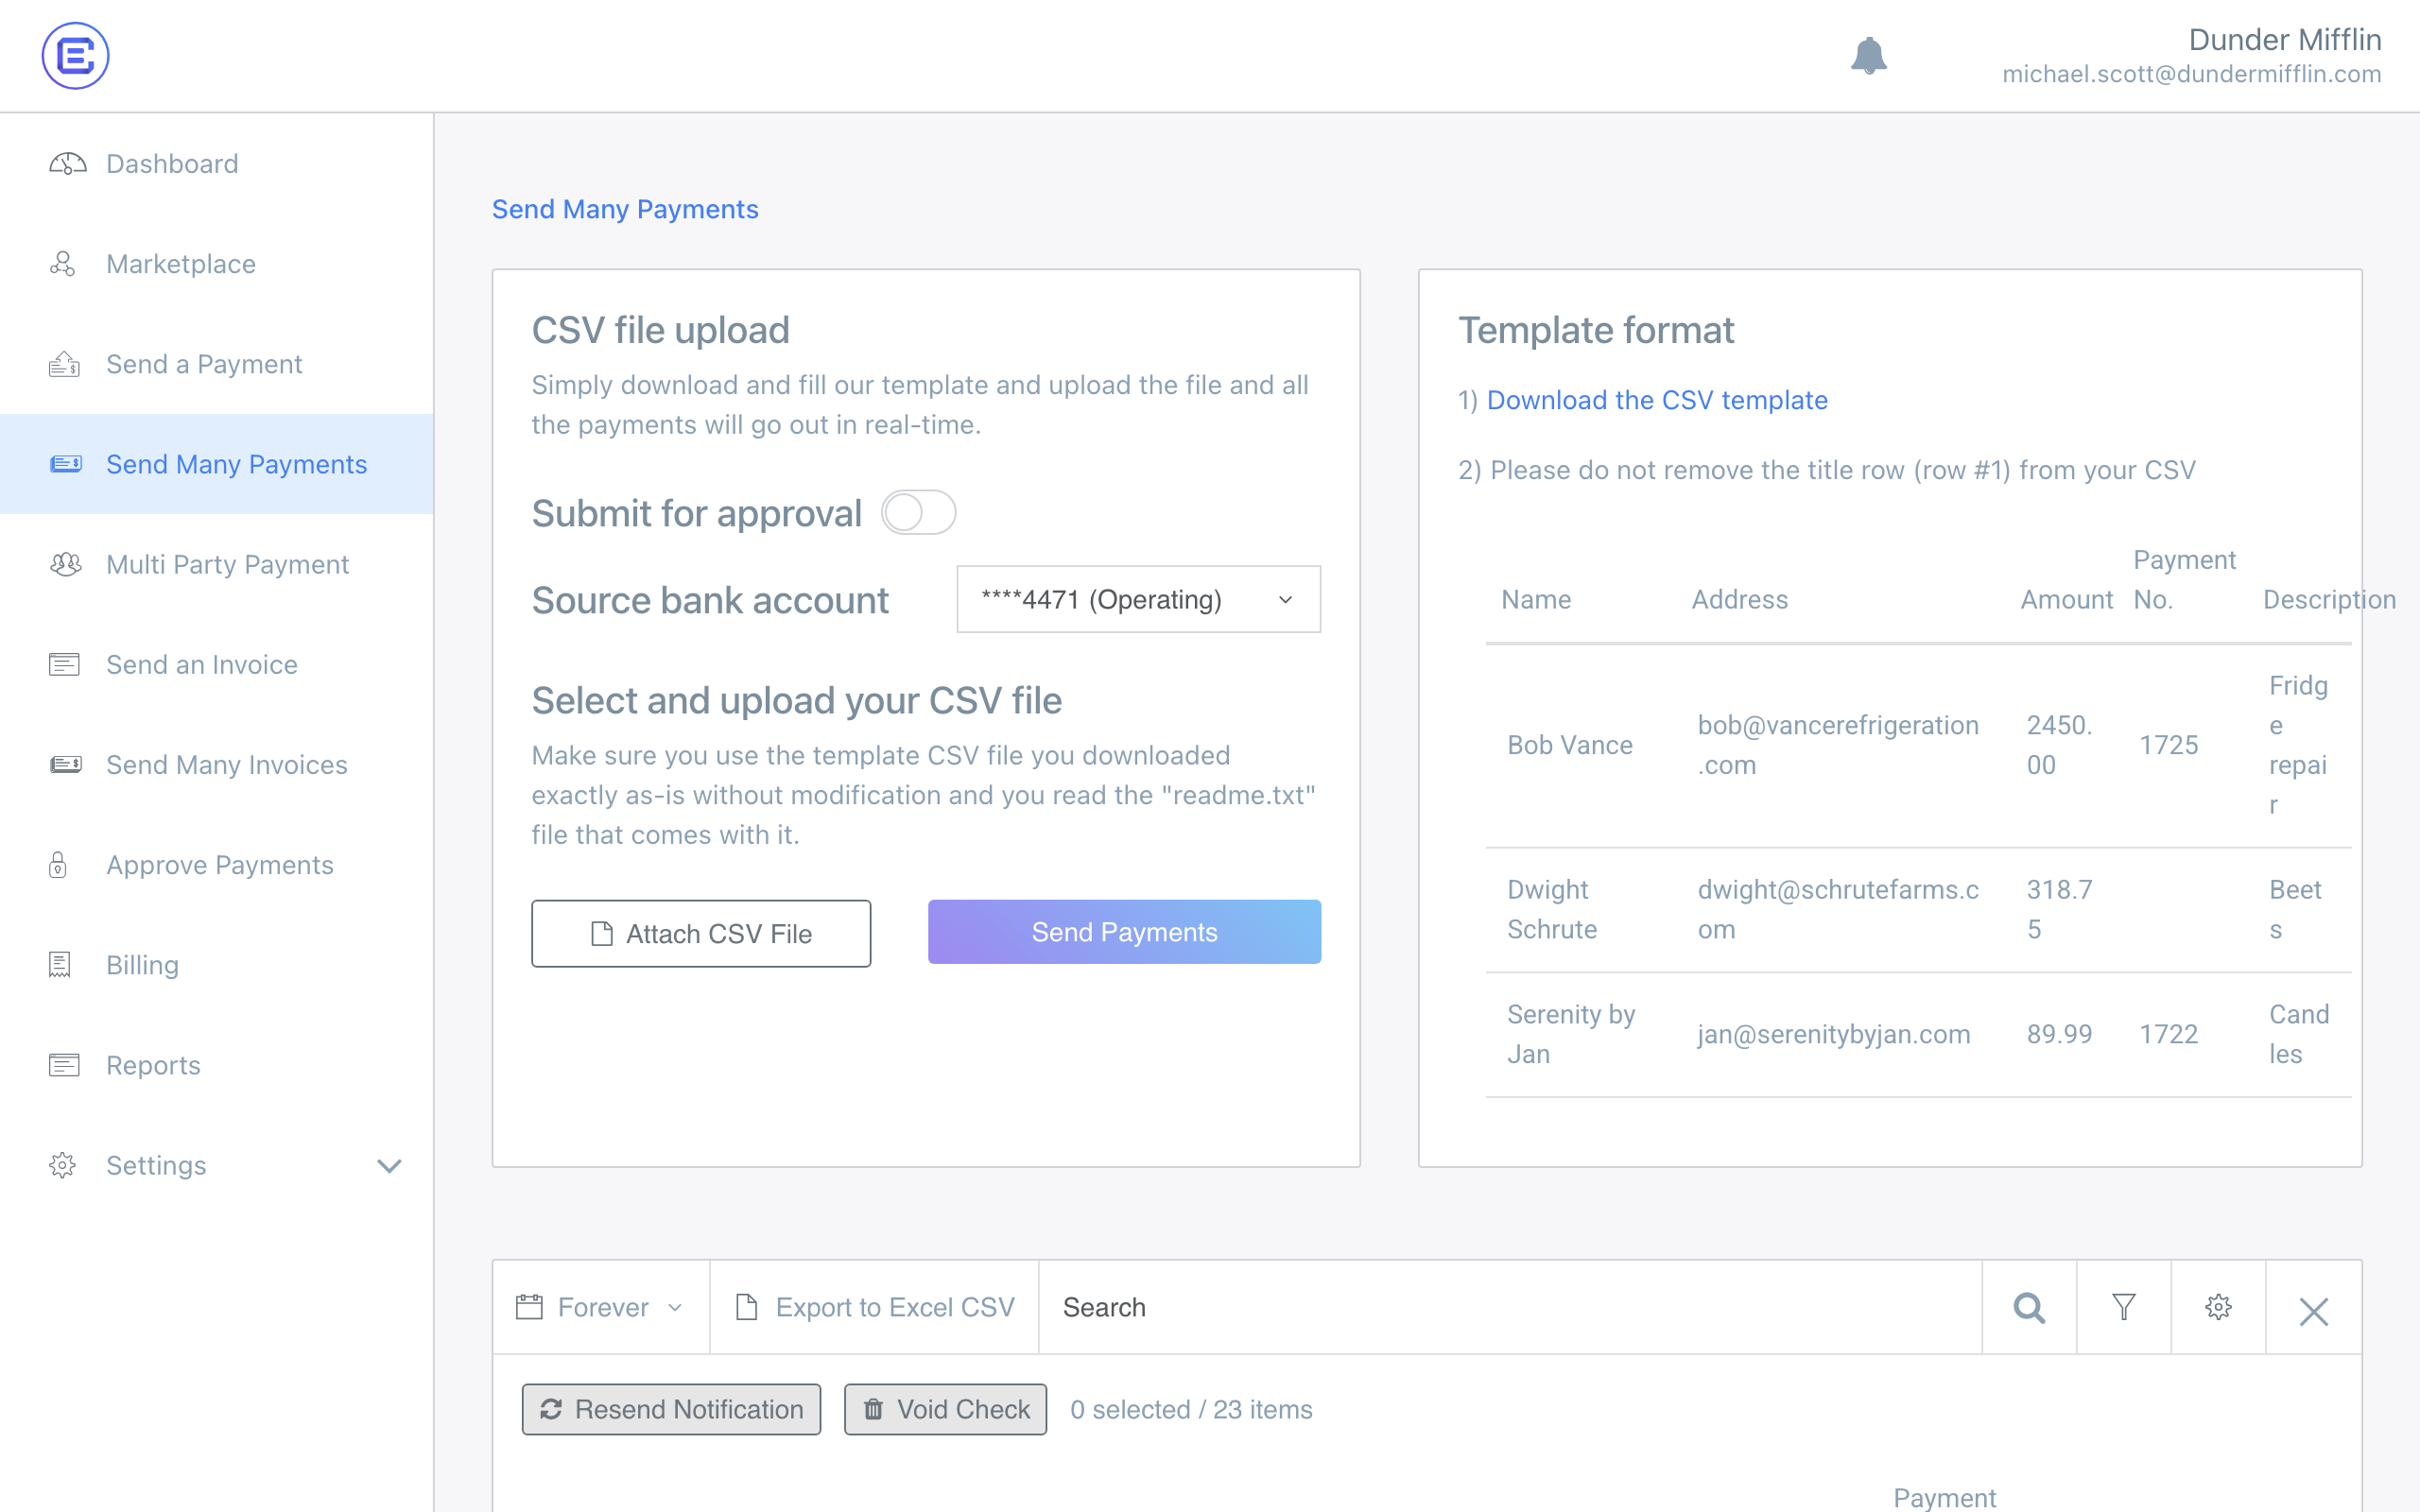
What they were: Send a Payment was a single-payment form with a live check preview. Send Many Payments was a separate screen for CSV upload, with the template format documented alongside it. Multi Party Payment was a third screen for paying several payees on one check. Marketplace › Send a Payment was a fourth, for sending on behalf of a marketplace user. Each one carried its own copy of the payment history table.
What changed: Unified payouts
- Single or Batch is a toggle in the top right, rather than two destinations.
- Multi Party Payment is now Add recipient on the Send payment screen — there is no separate multi party screen to go to.
- Sending as a marketplace user can be achieved by changing the From field at the top of the Send payment screen, rather than a separate tab behind the Marketplace page.
- The history table is gone from all four, replaced by one history at Payments › Payment history
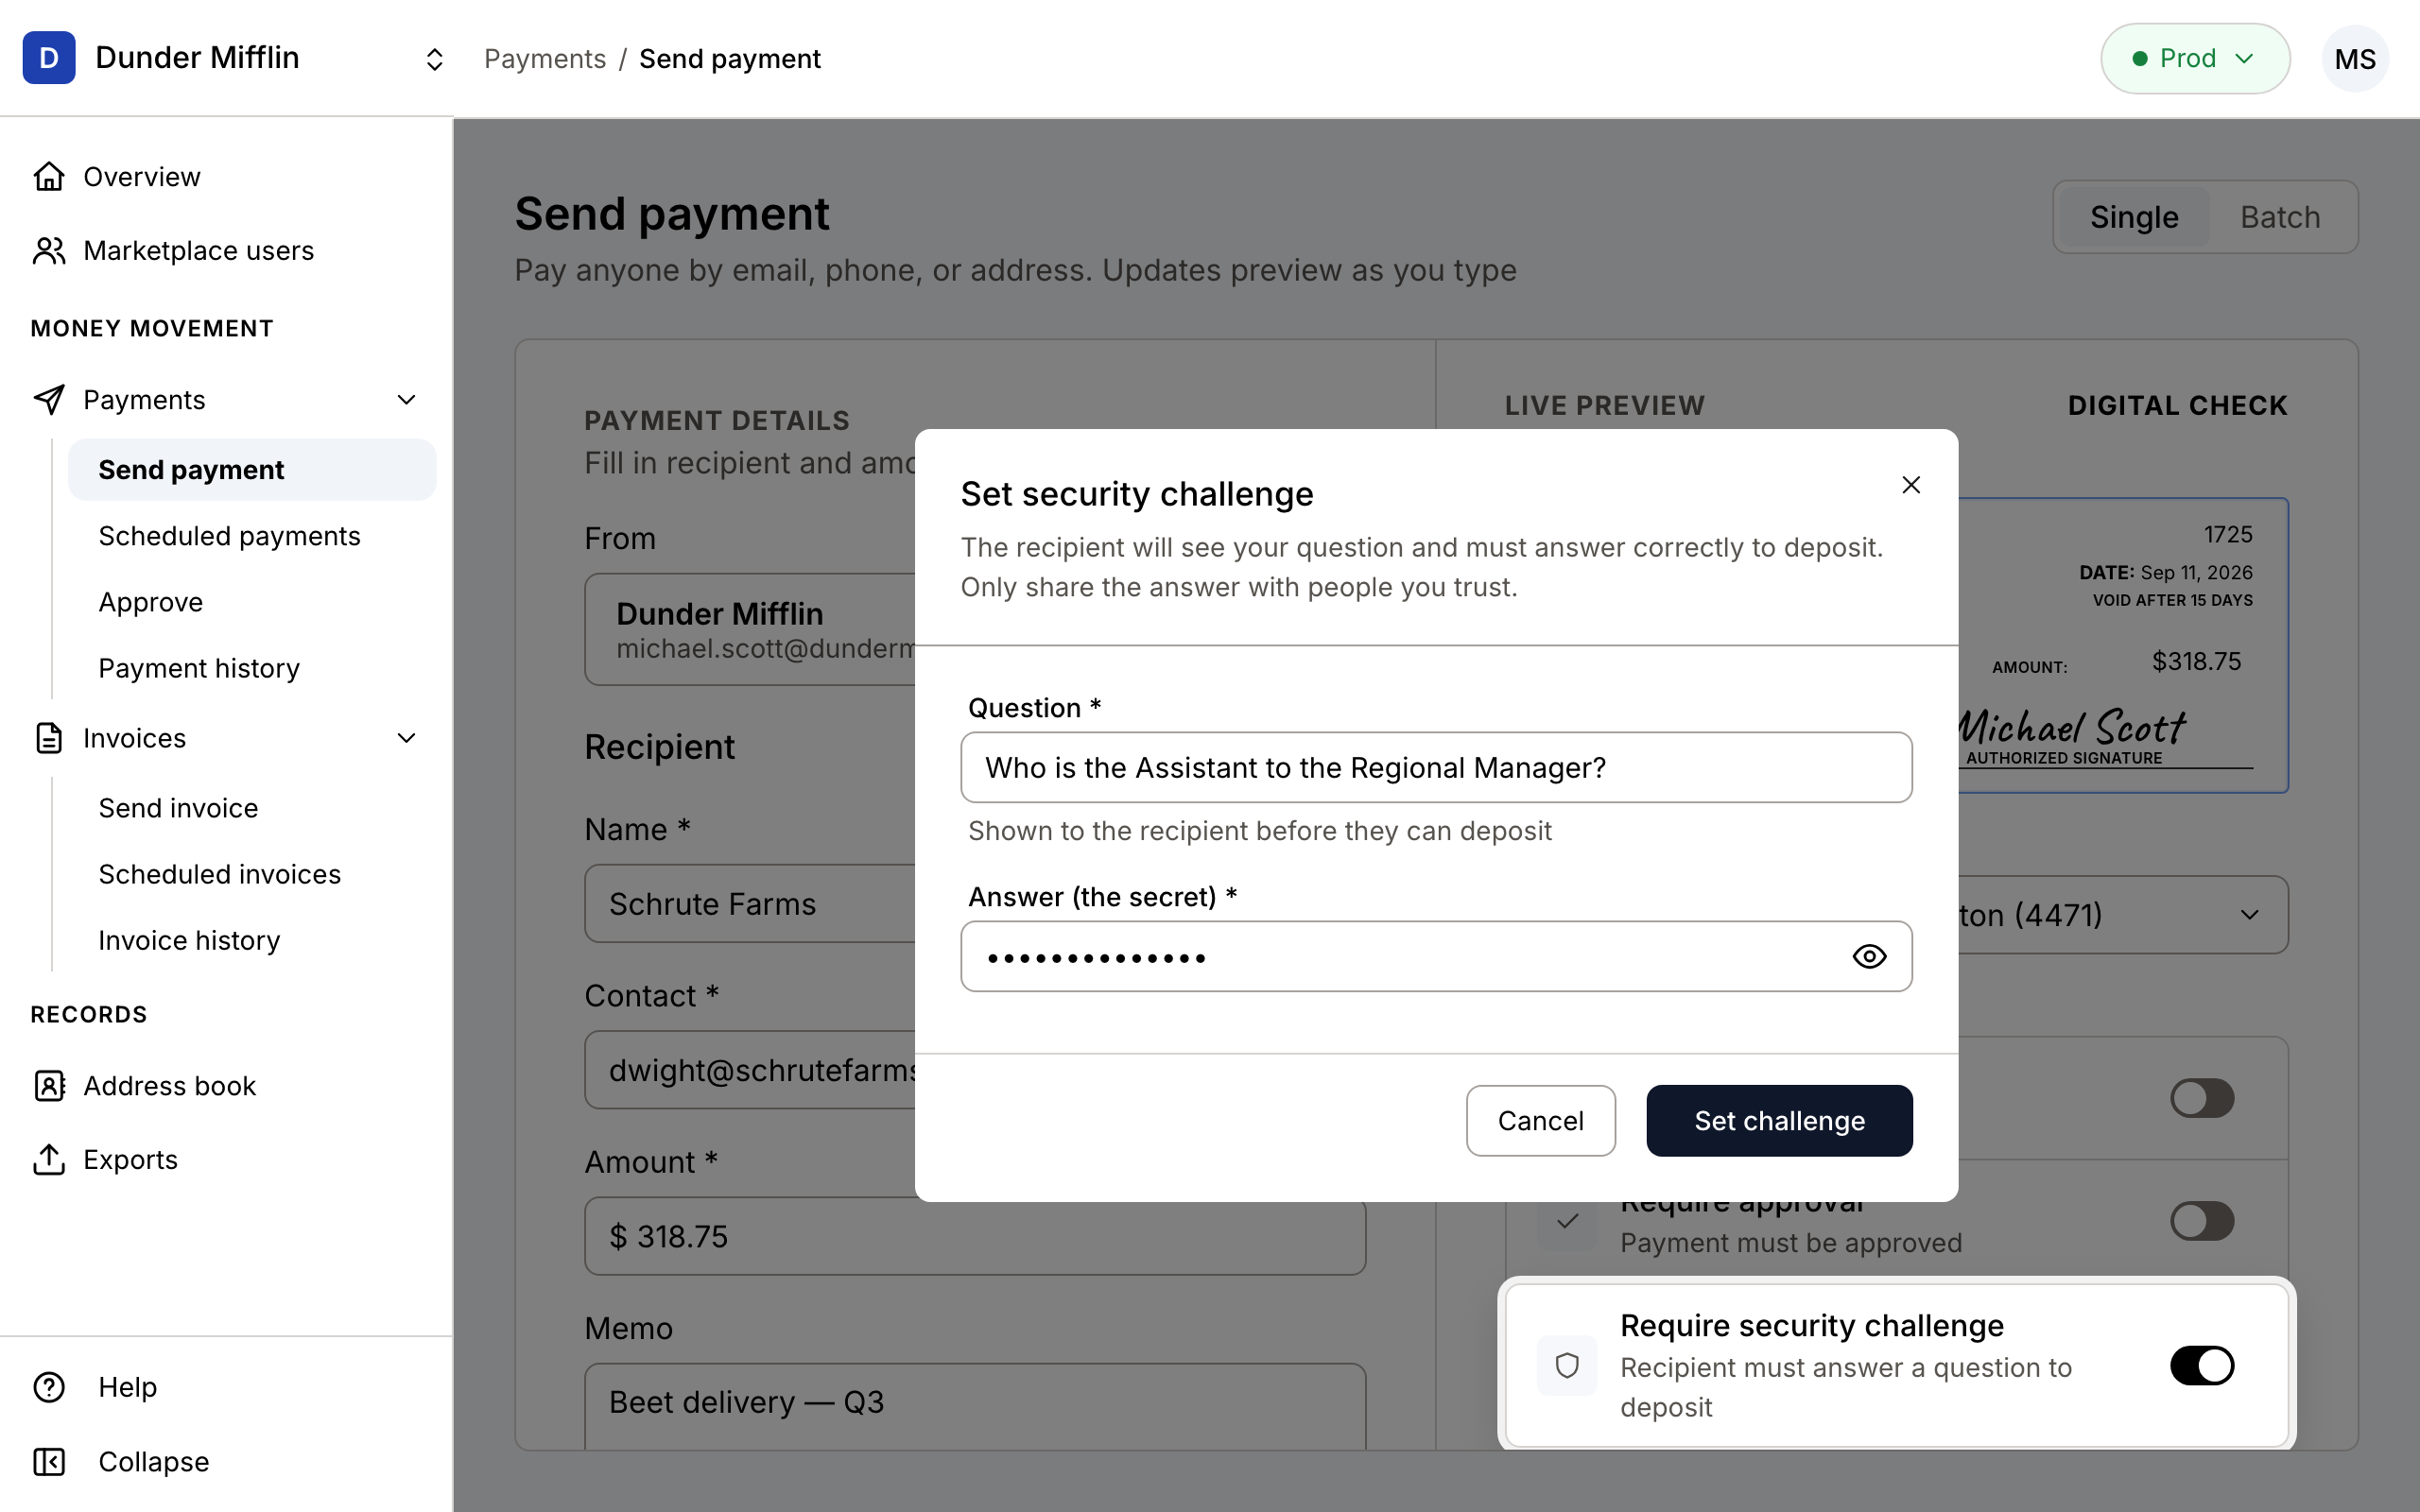
- The Live Preview of the Send payment screen now carries send limits, source account, and per payment customizations: approval requirements, deposit options, and a new security challenge.
 Send a Payment
 Send Many Payments
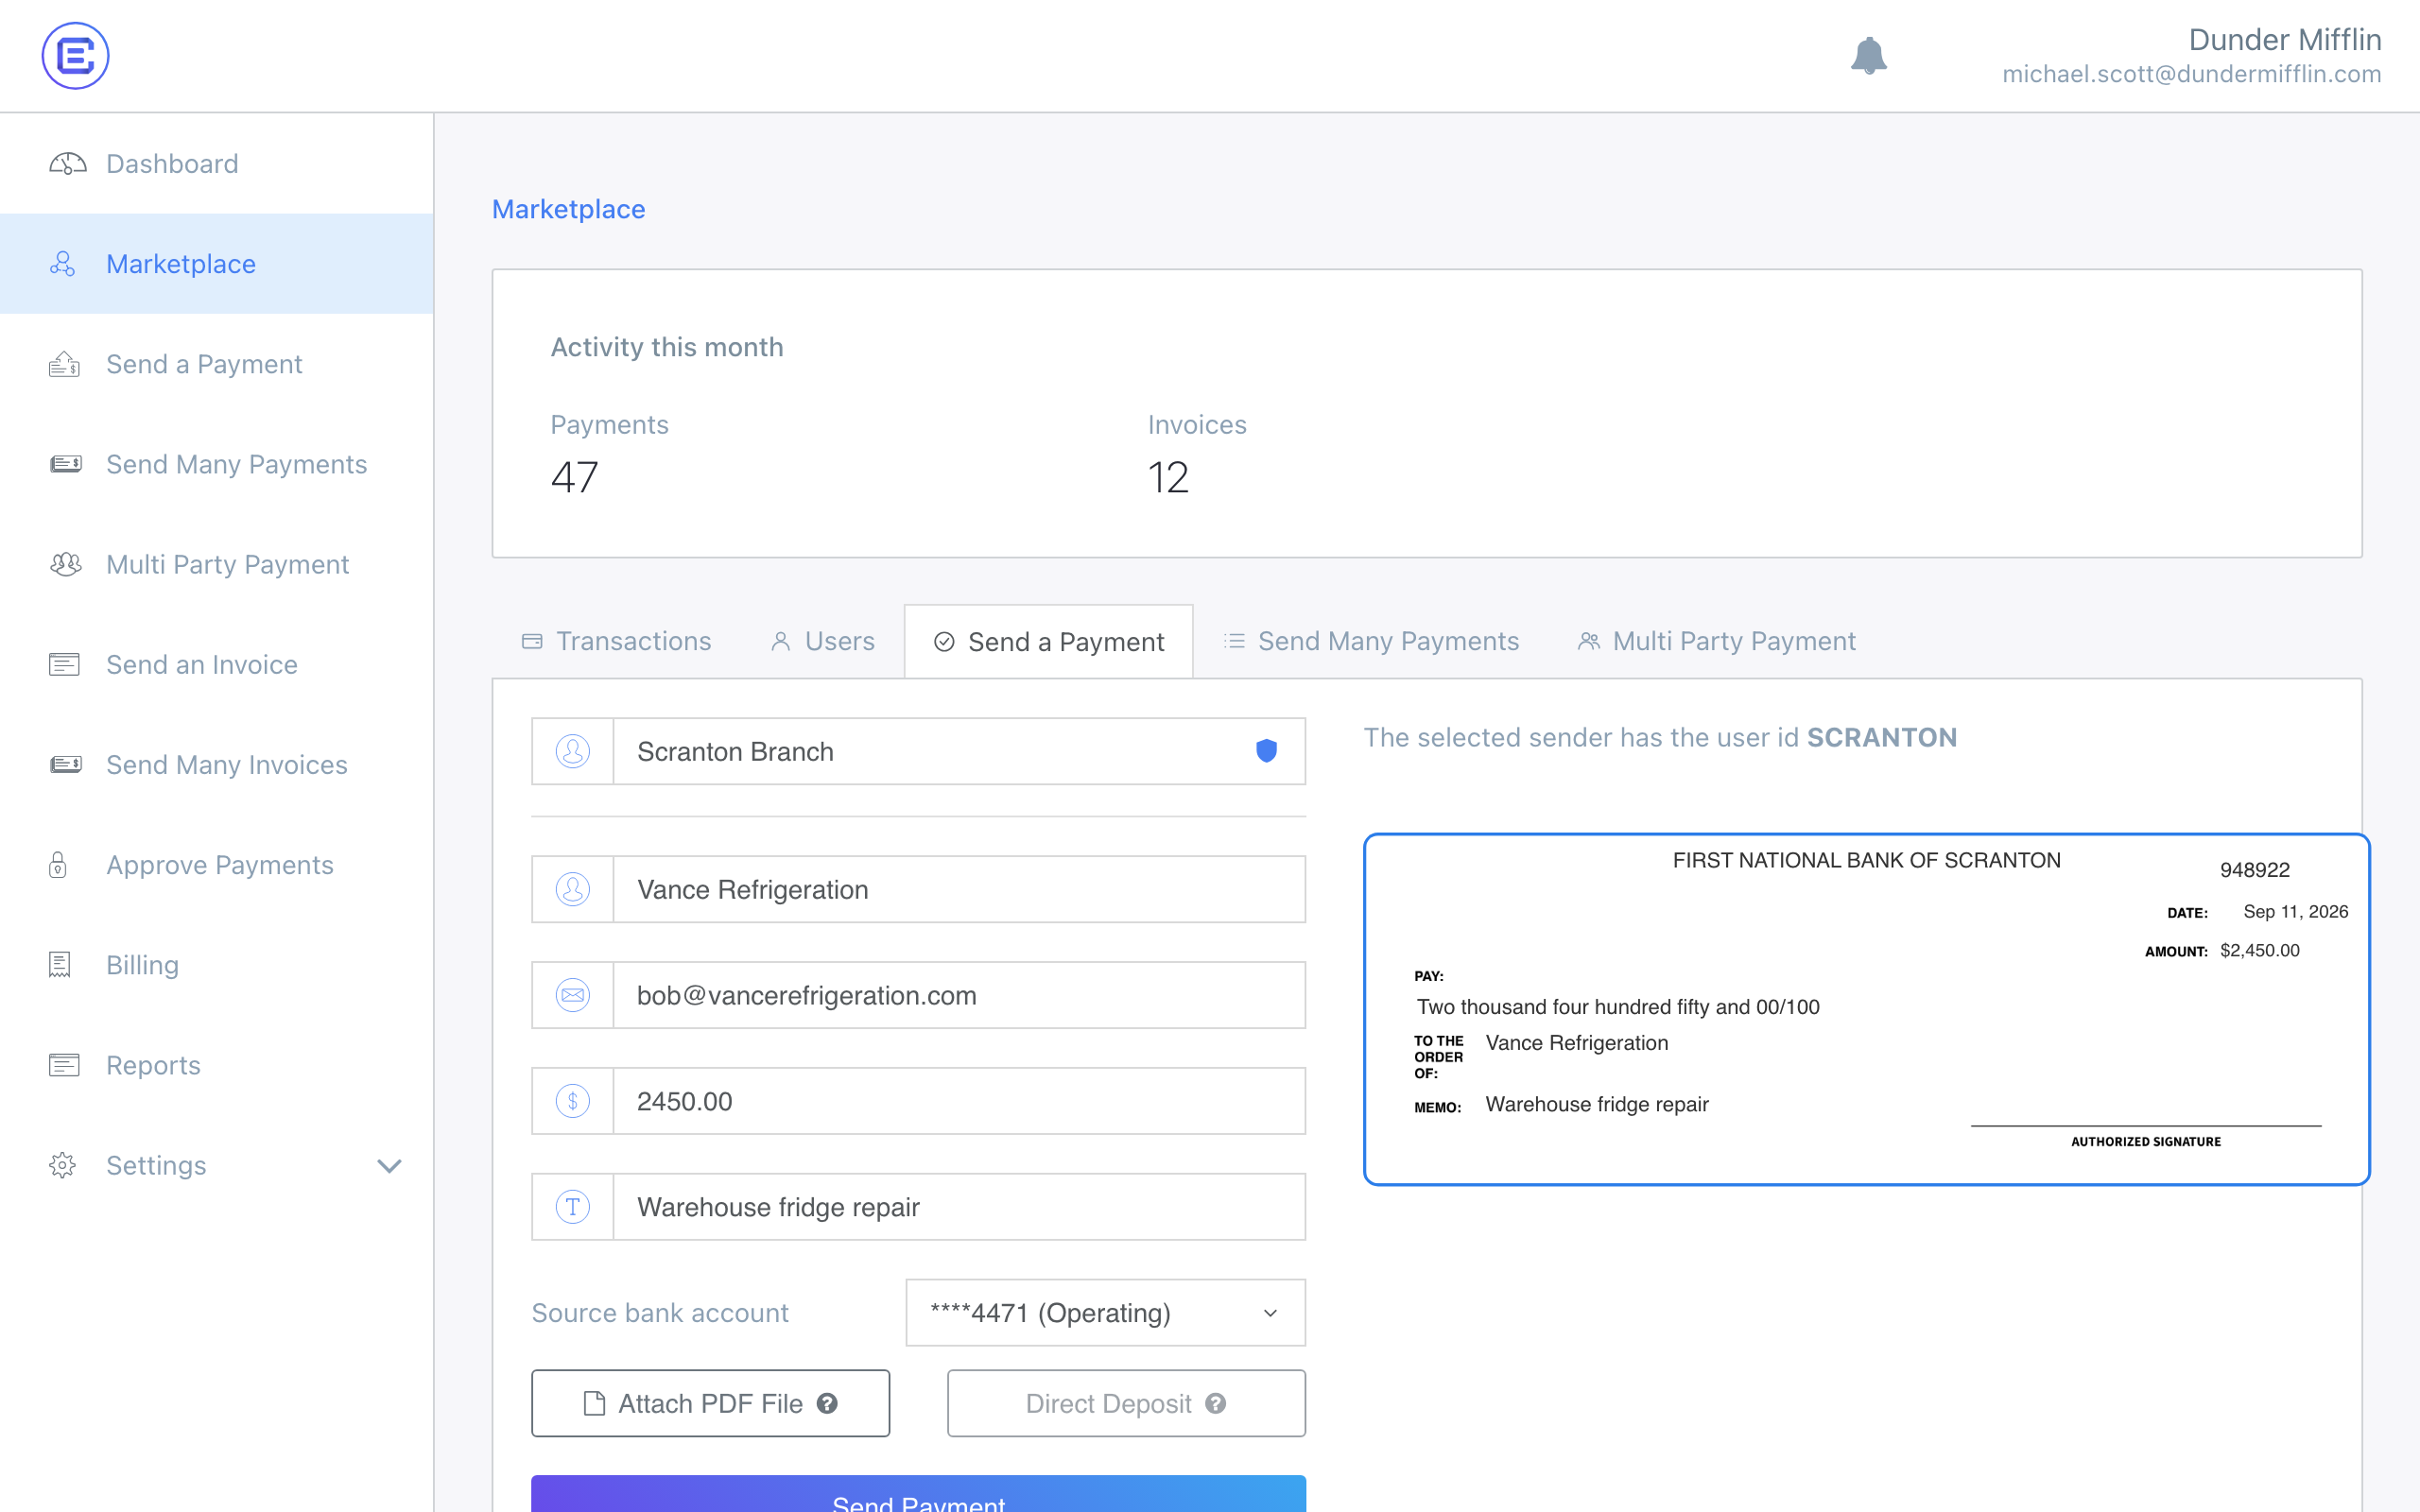 Marketplace › Send a Payment
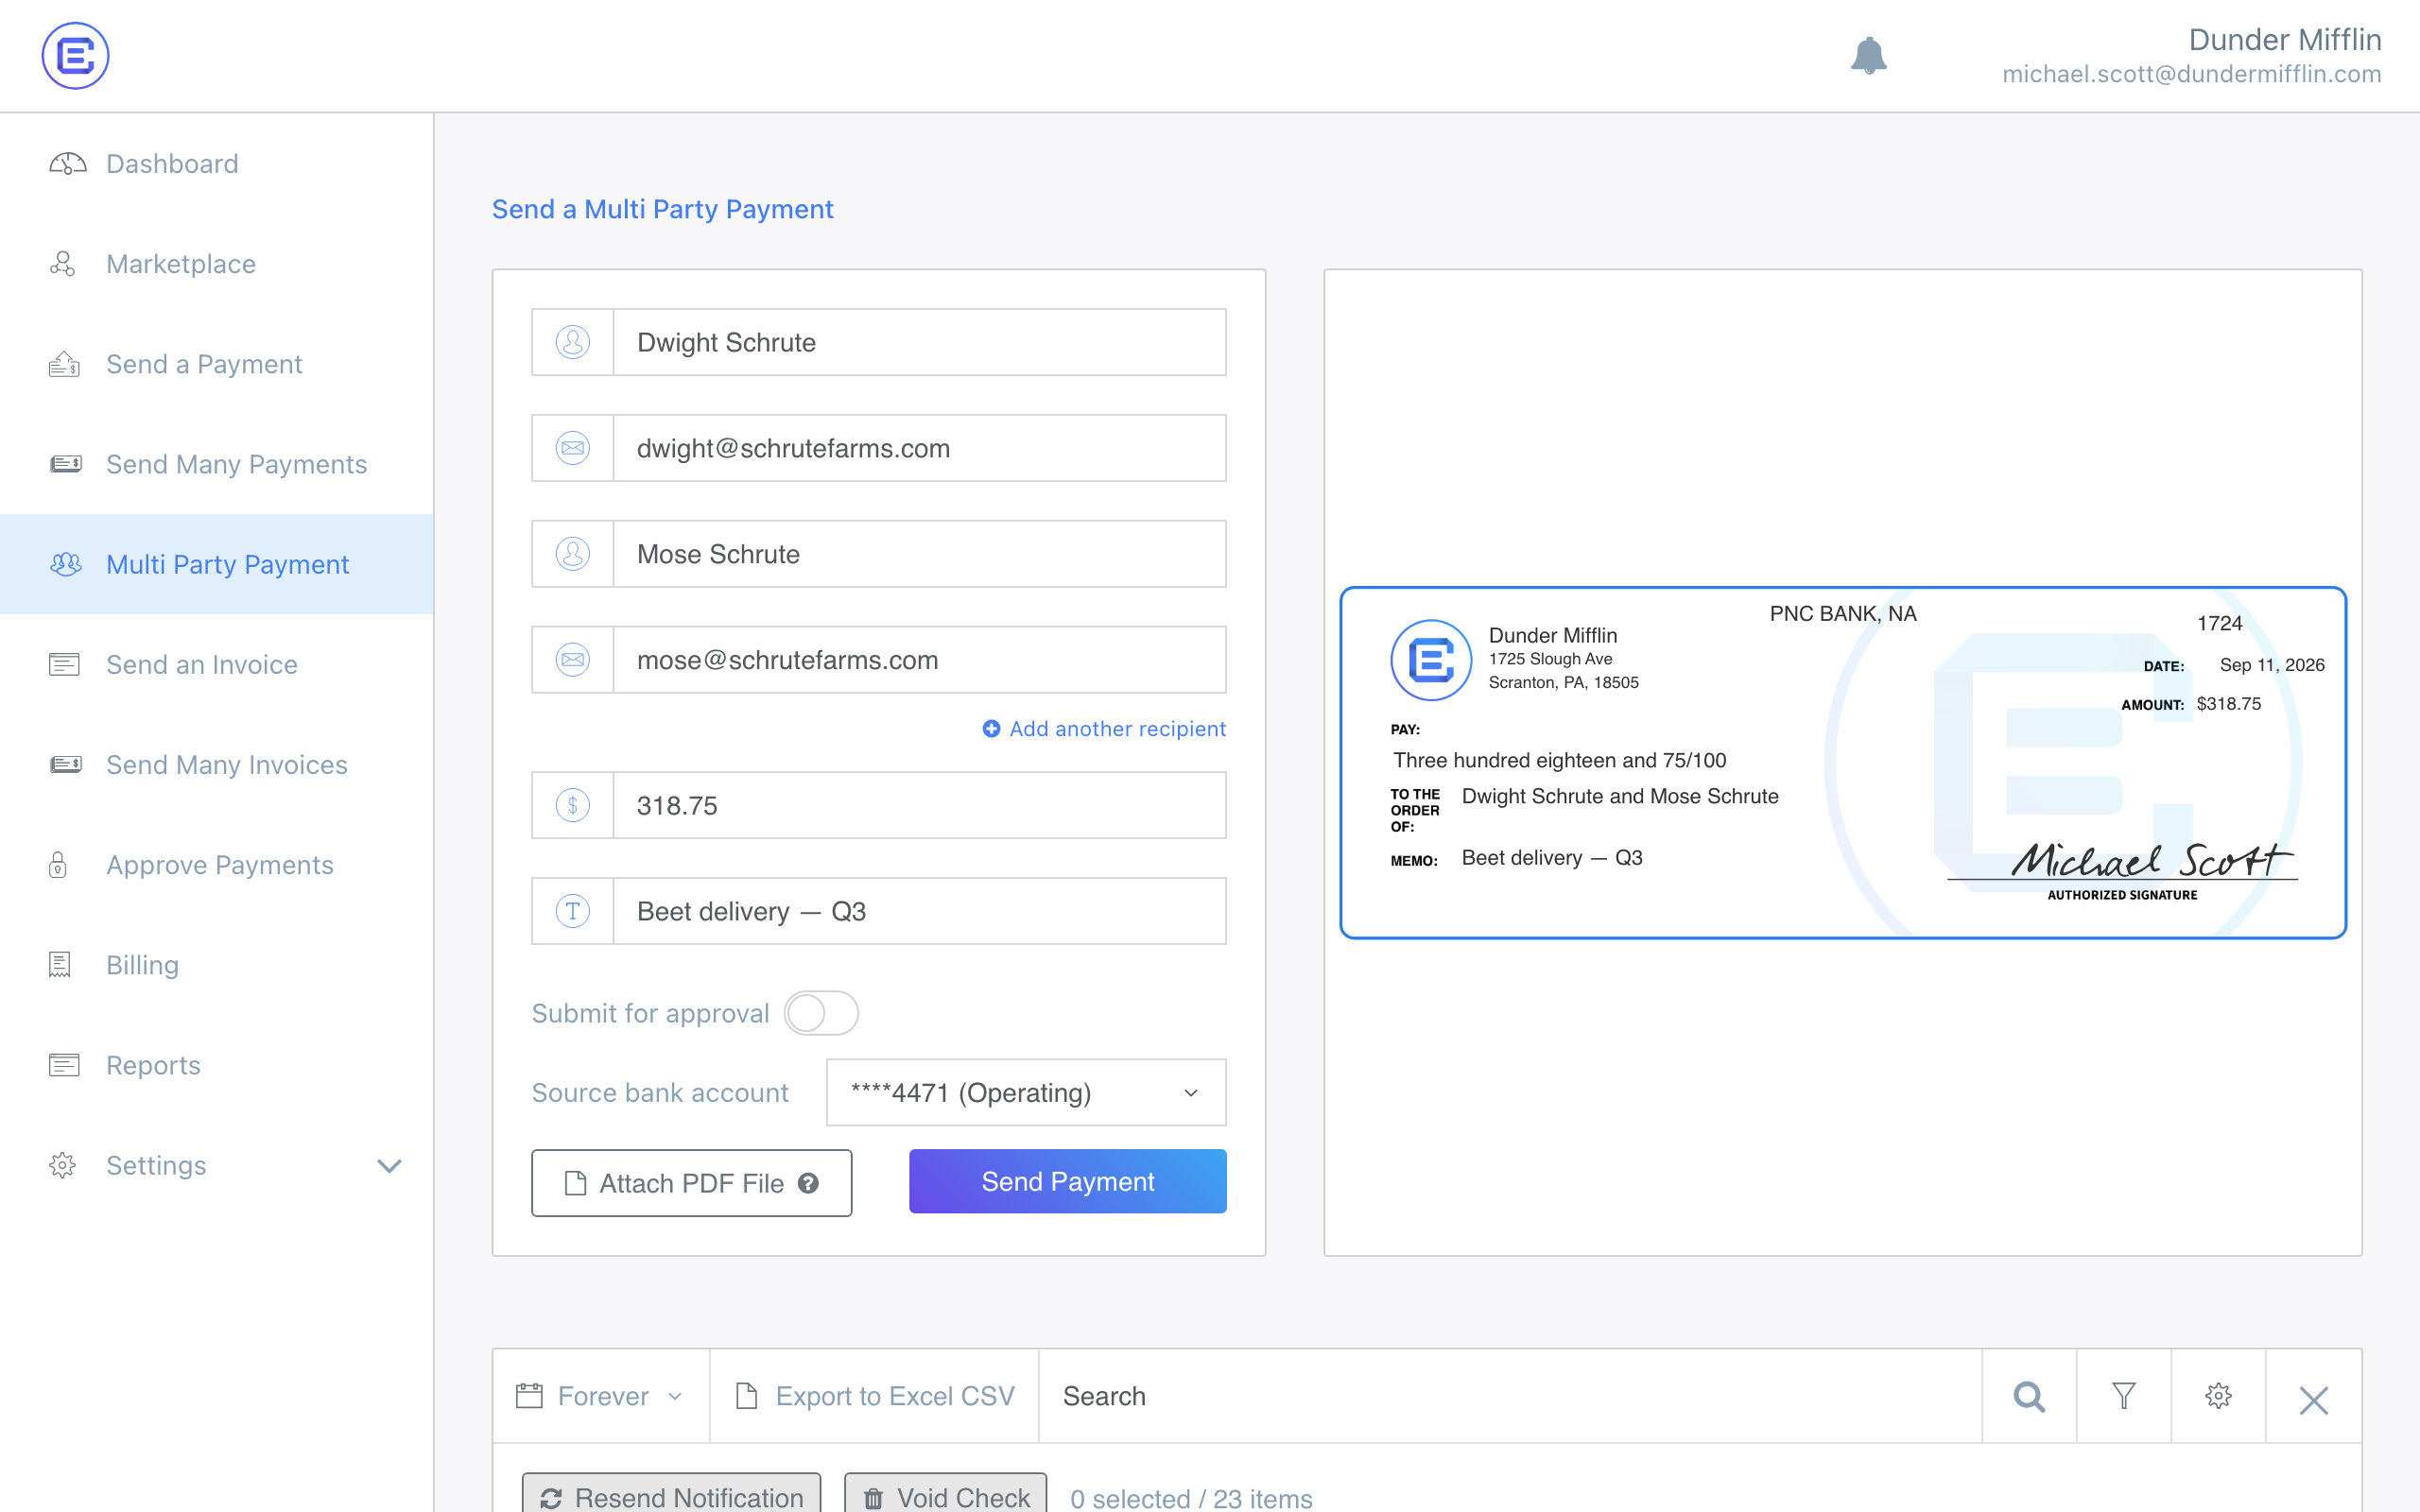 Multi Party Payment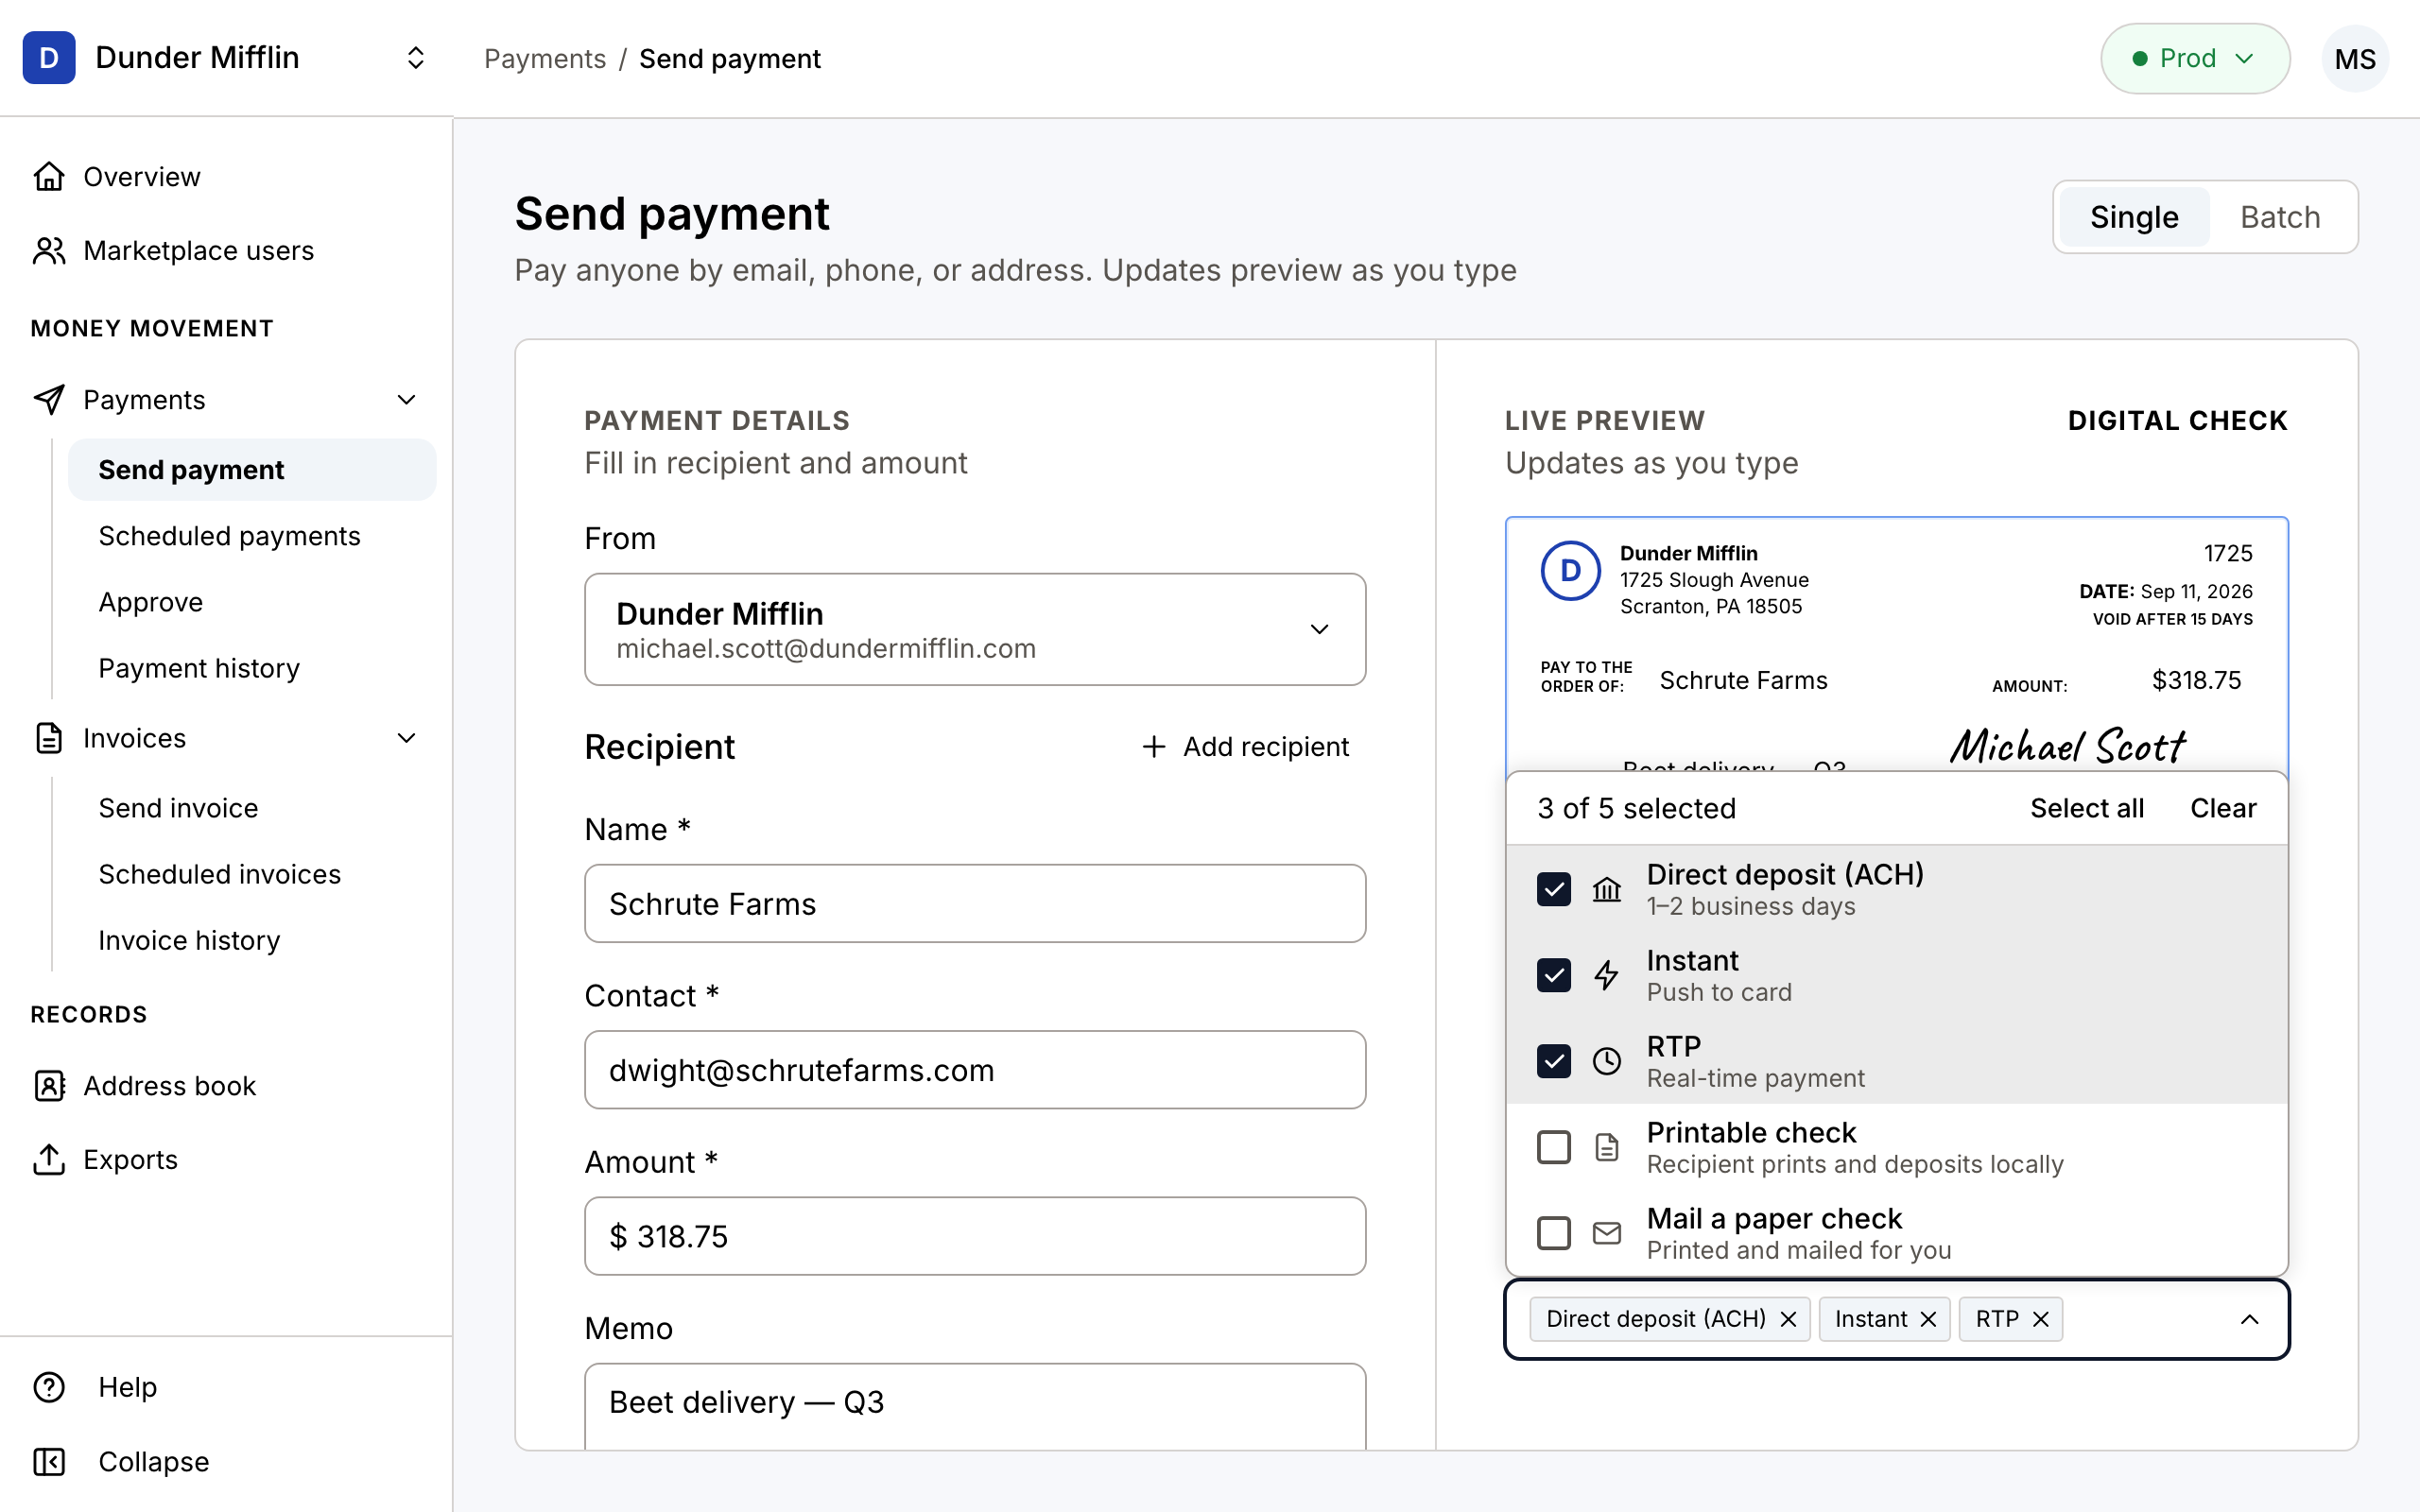
Three features on the Send payment screen are new:
1. Deposit options per payment
Deposit options used to be an account-wide setting only. You can now choose which options a recipient sees on an individual payment, for both single and batch sends.
Payments you send without touching this field continue to use the account-wide default set in Settings › Recipient experience, so existing habits and integrations behave exactly as before.
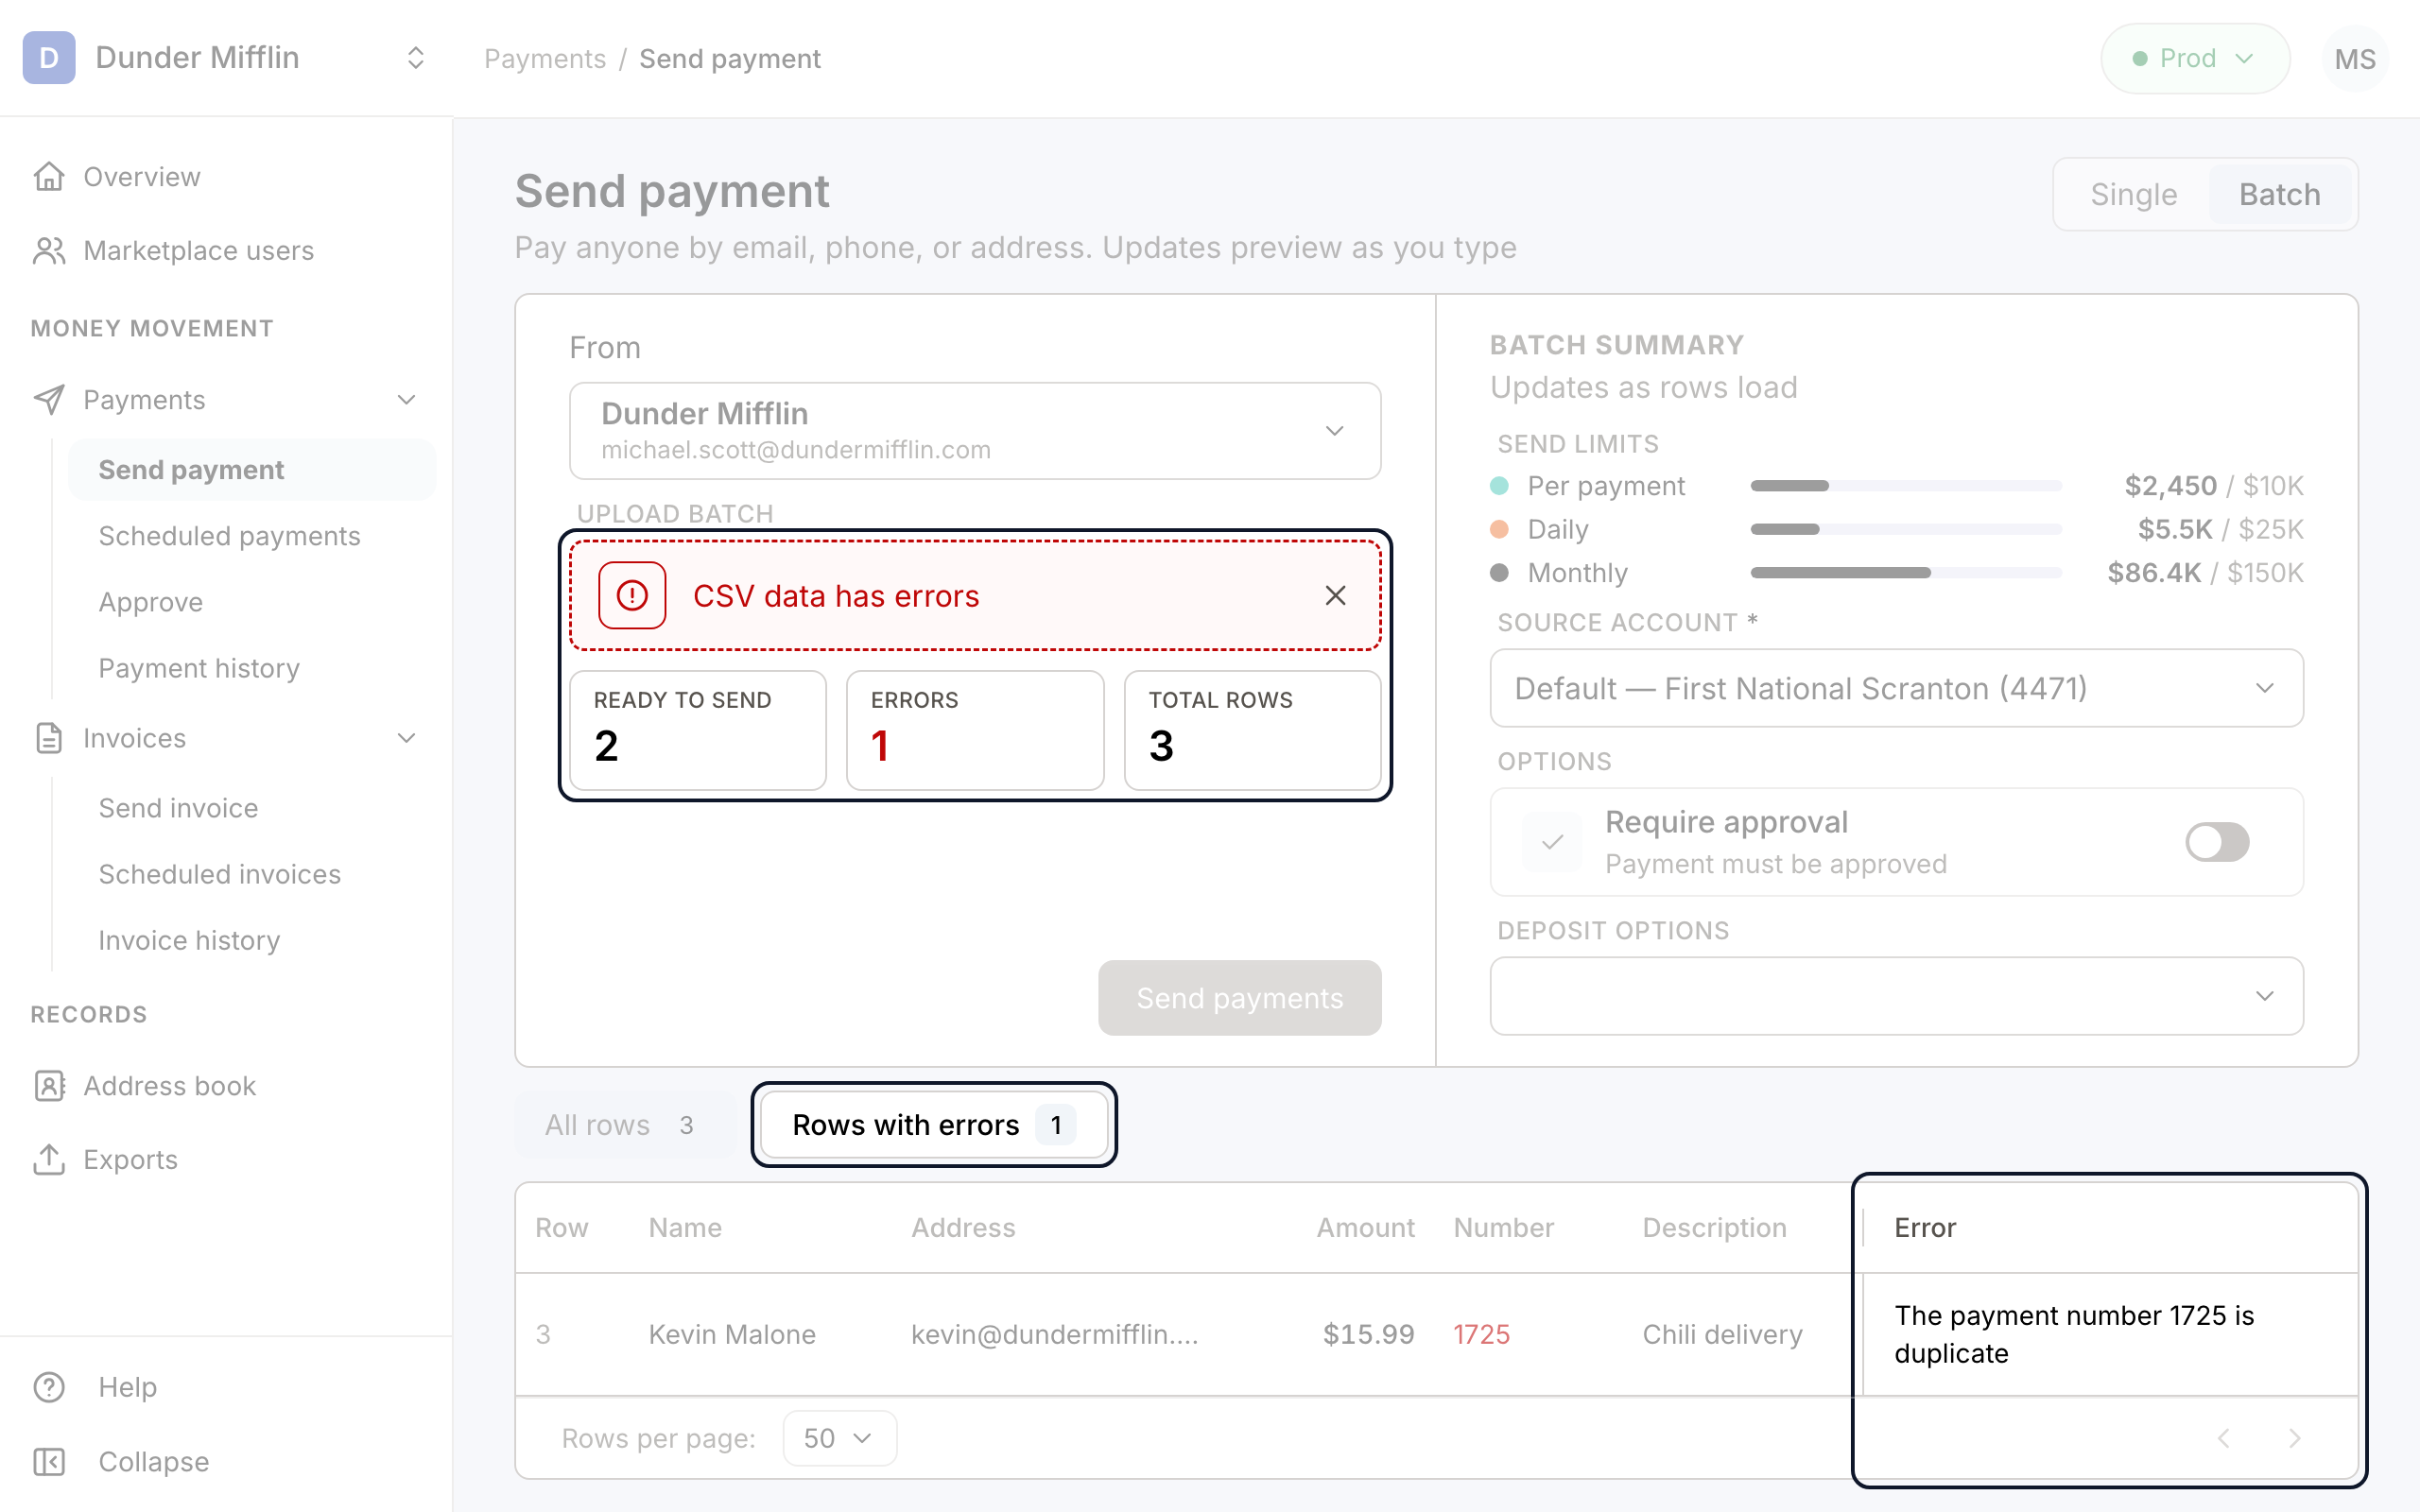
2. Clearer batch errors
Batch payments and invoices are validated upon CSV upload, before any payments are sent. The summary tells you how many rows are ready and how many have errors, a Rows with errors tab filters the table to just those rows, and each row carries a specific error reason in its own column.
3. Security challenges
Individual payments can be protected with a challenge question for the recipient. Set the question and answer when you send, and the recipient must answer correctly before they can deposit. Previously available through the API only, this is now a toggle on the Send payment screen.
Payment history
What it was: Five separate tables located across the Dashboard, Send a Payment, Send Many Payments, Multi Party Payment, and Marketplace screens.
What changed: A consolidated payments history, at Payments › Payment history. The Sender column tells you which account a payment came from, so your own payments and your marketplace users’ sit in one list, and search, filters, sorting, and CSV export all operate across the combined set. Payments and invoices each get their own send, scheduled, approve, and history views under Money movement.
Settings
What it was: A single expandable sidebar item, with nine nested entries.
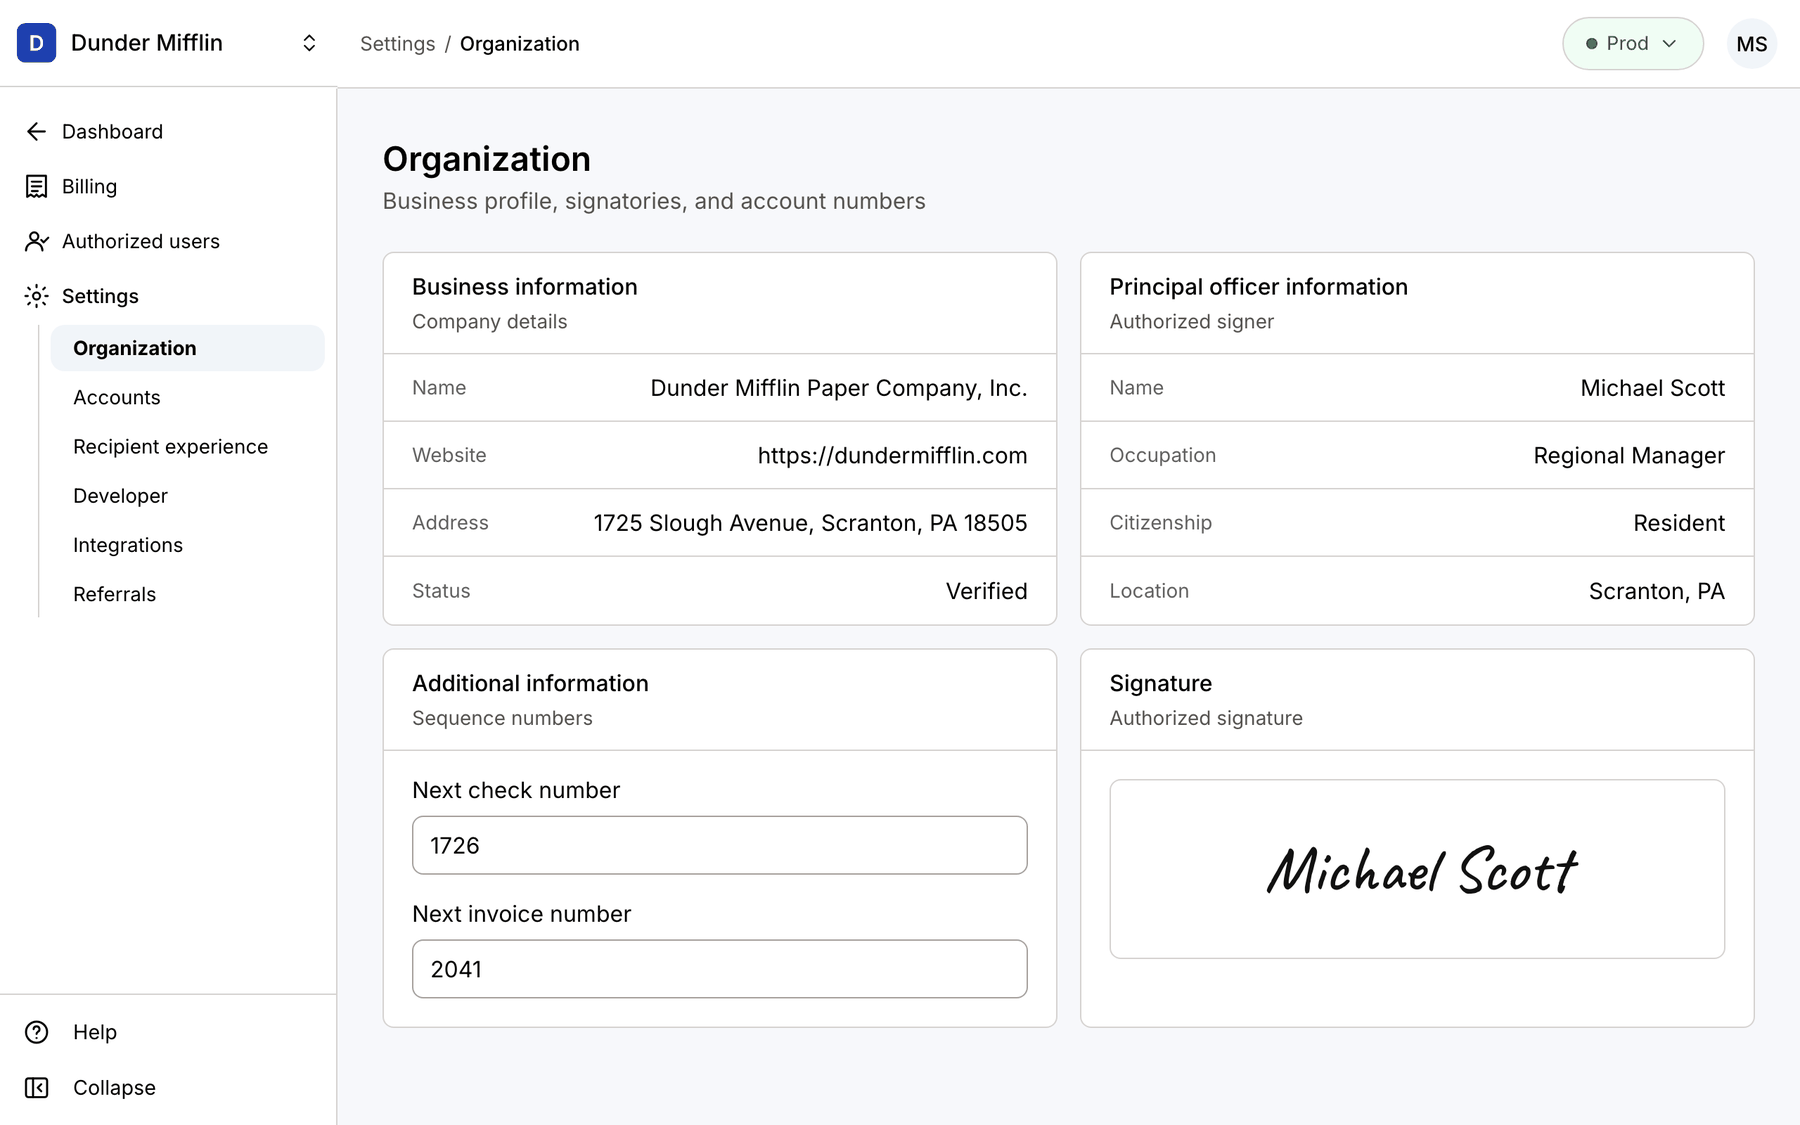
What changed: Settings now have a dedicated area with their own sections — Organization (previously Profile Info), Accounts (previously Accounts and Cards), Recipient experience, Developer, Integrations, and Referrals — alongside Billing and Authorized users.
Organization
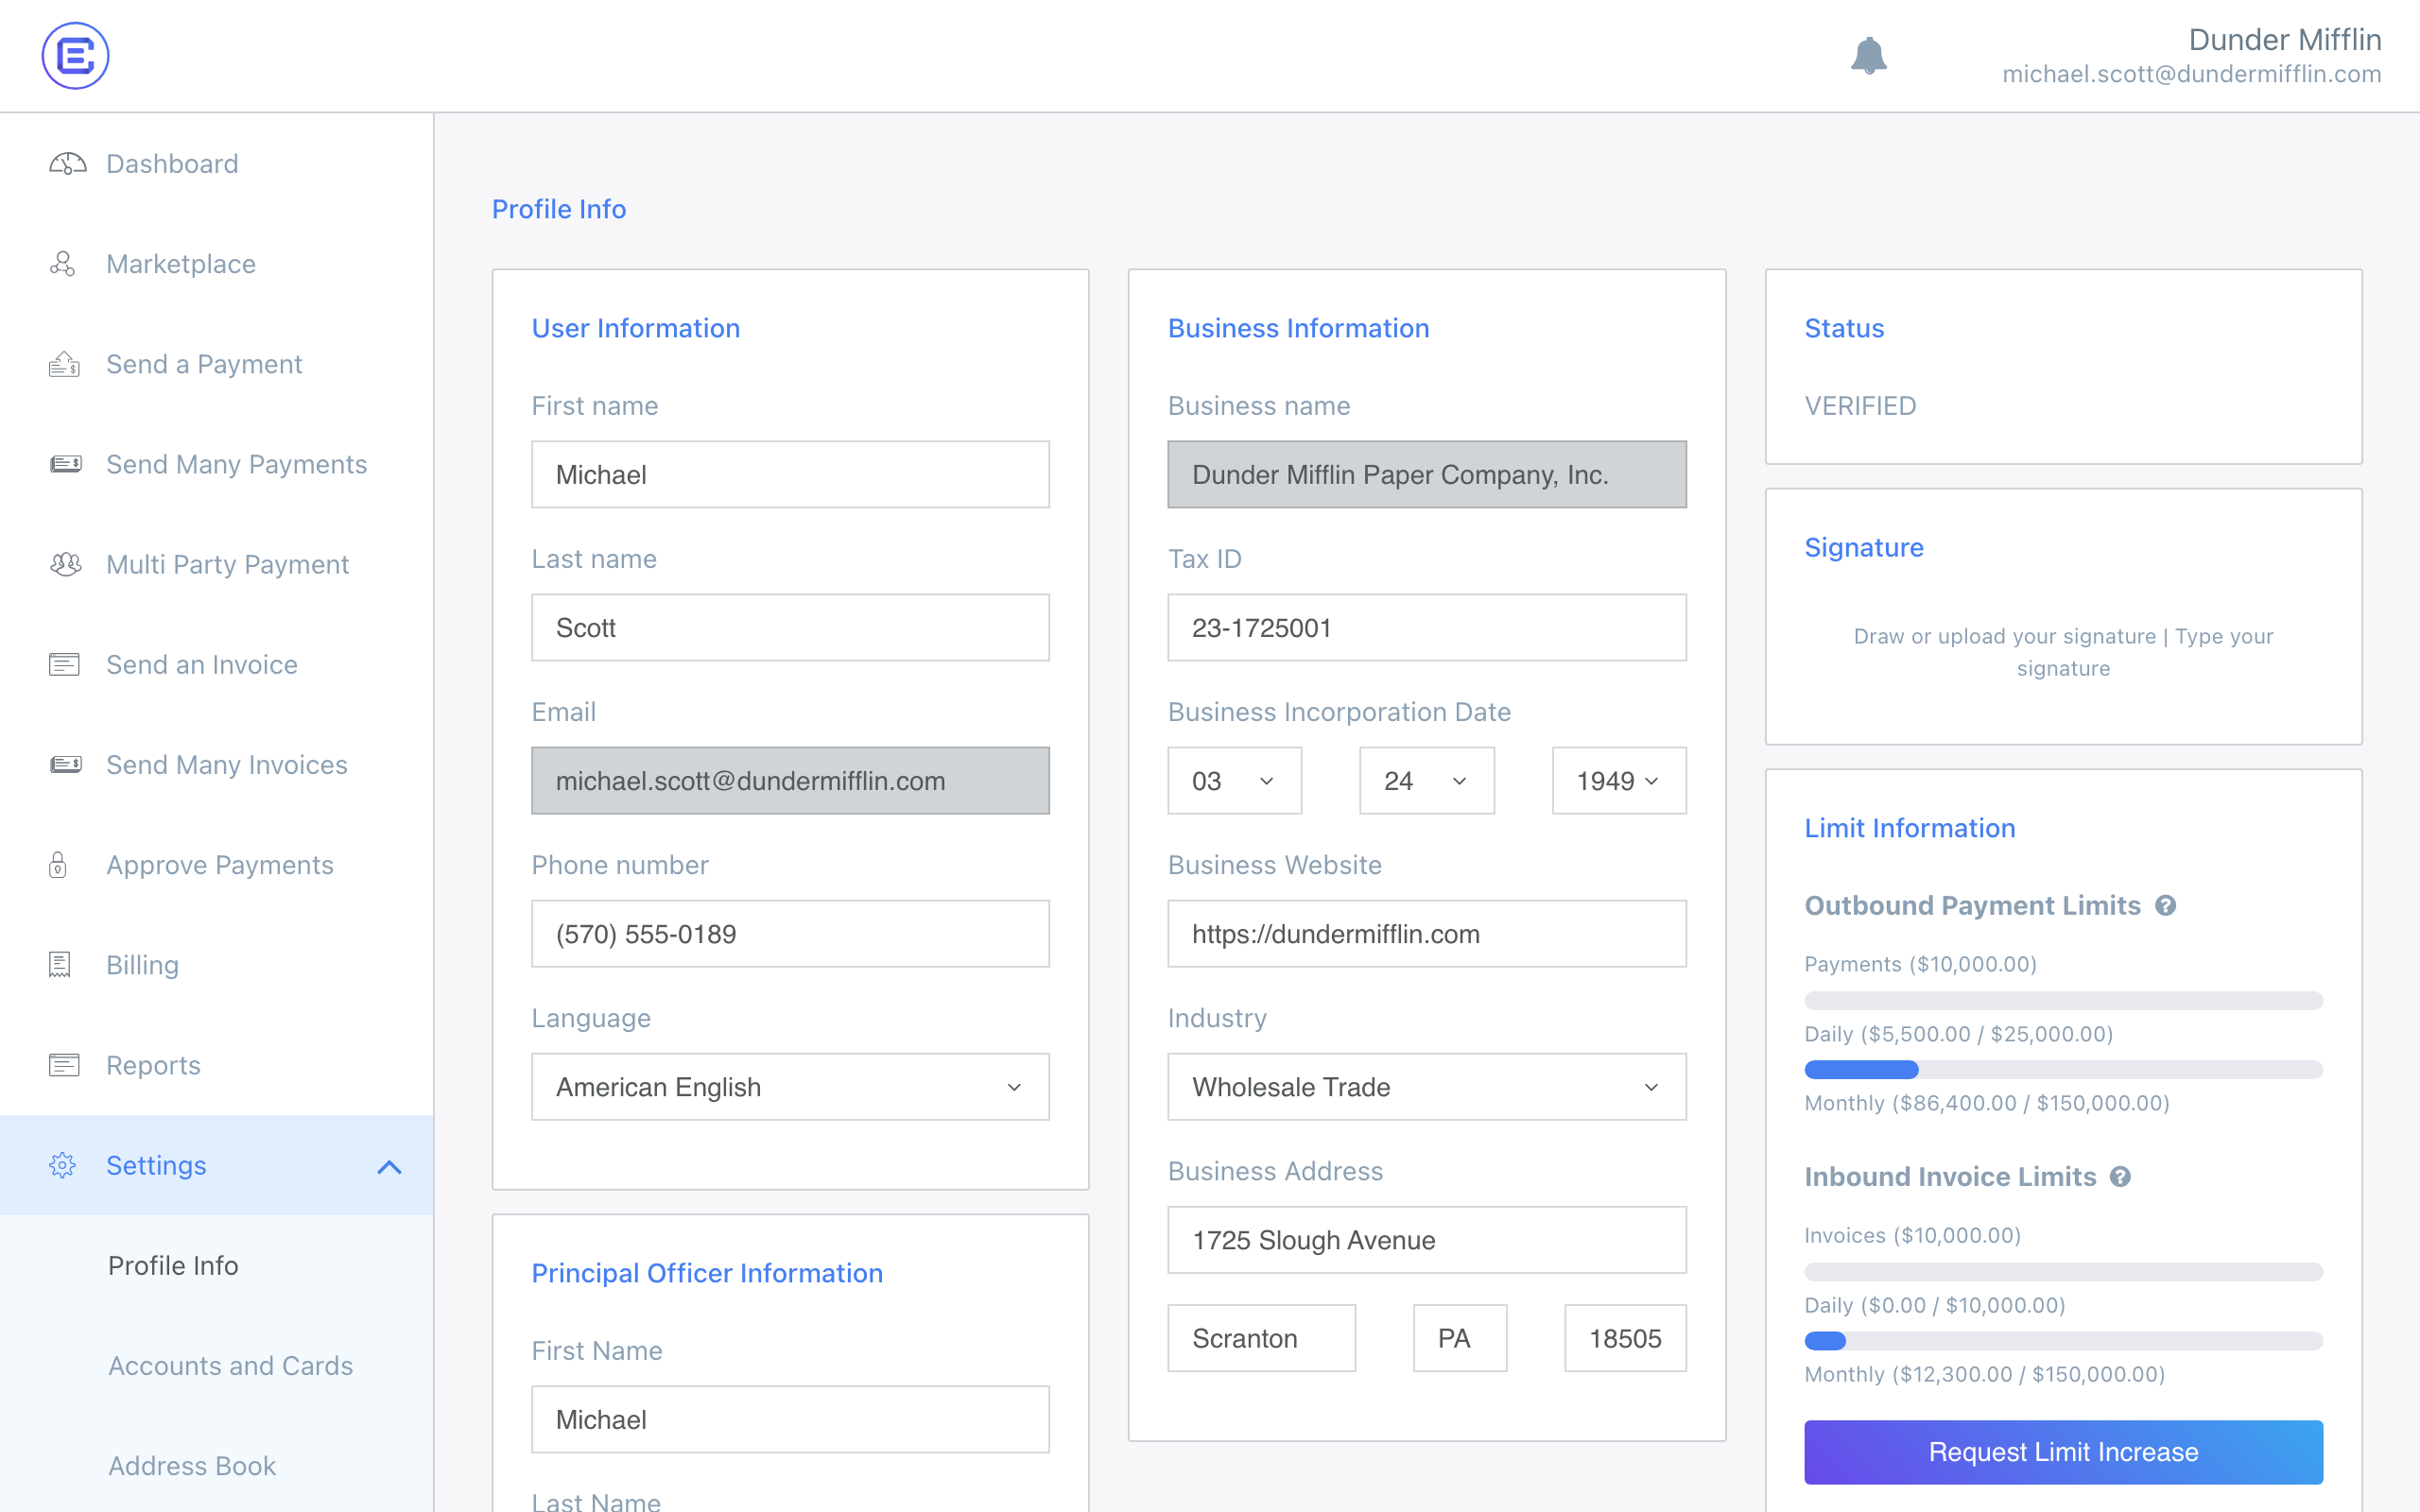
What it was: Previously Profile Info — One long form combining your personal details, your business details, principal officer information, SSN, logo, signature, and limits.
What changed: Organization is now a summarized overview of the business: profile, signatories, and sequence numbers.
Accounts
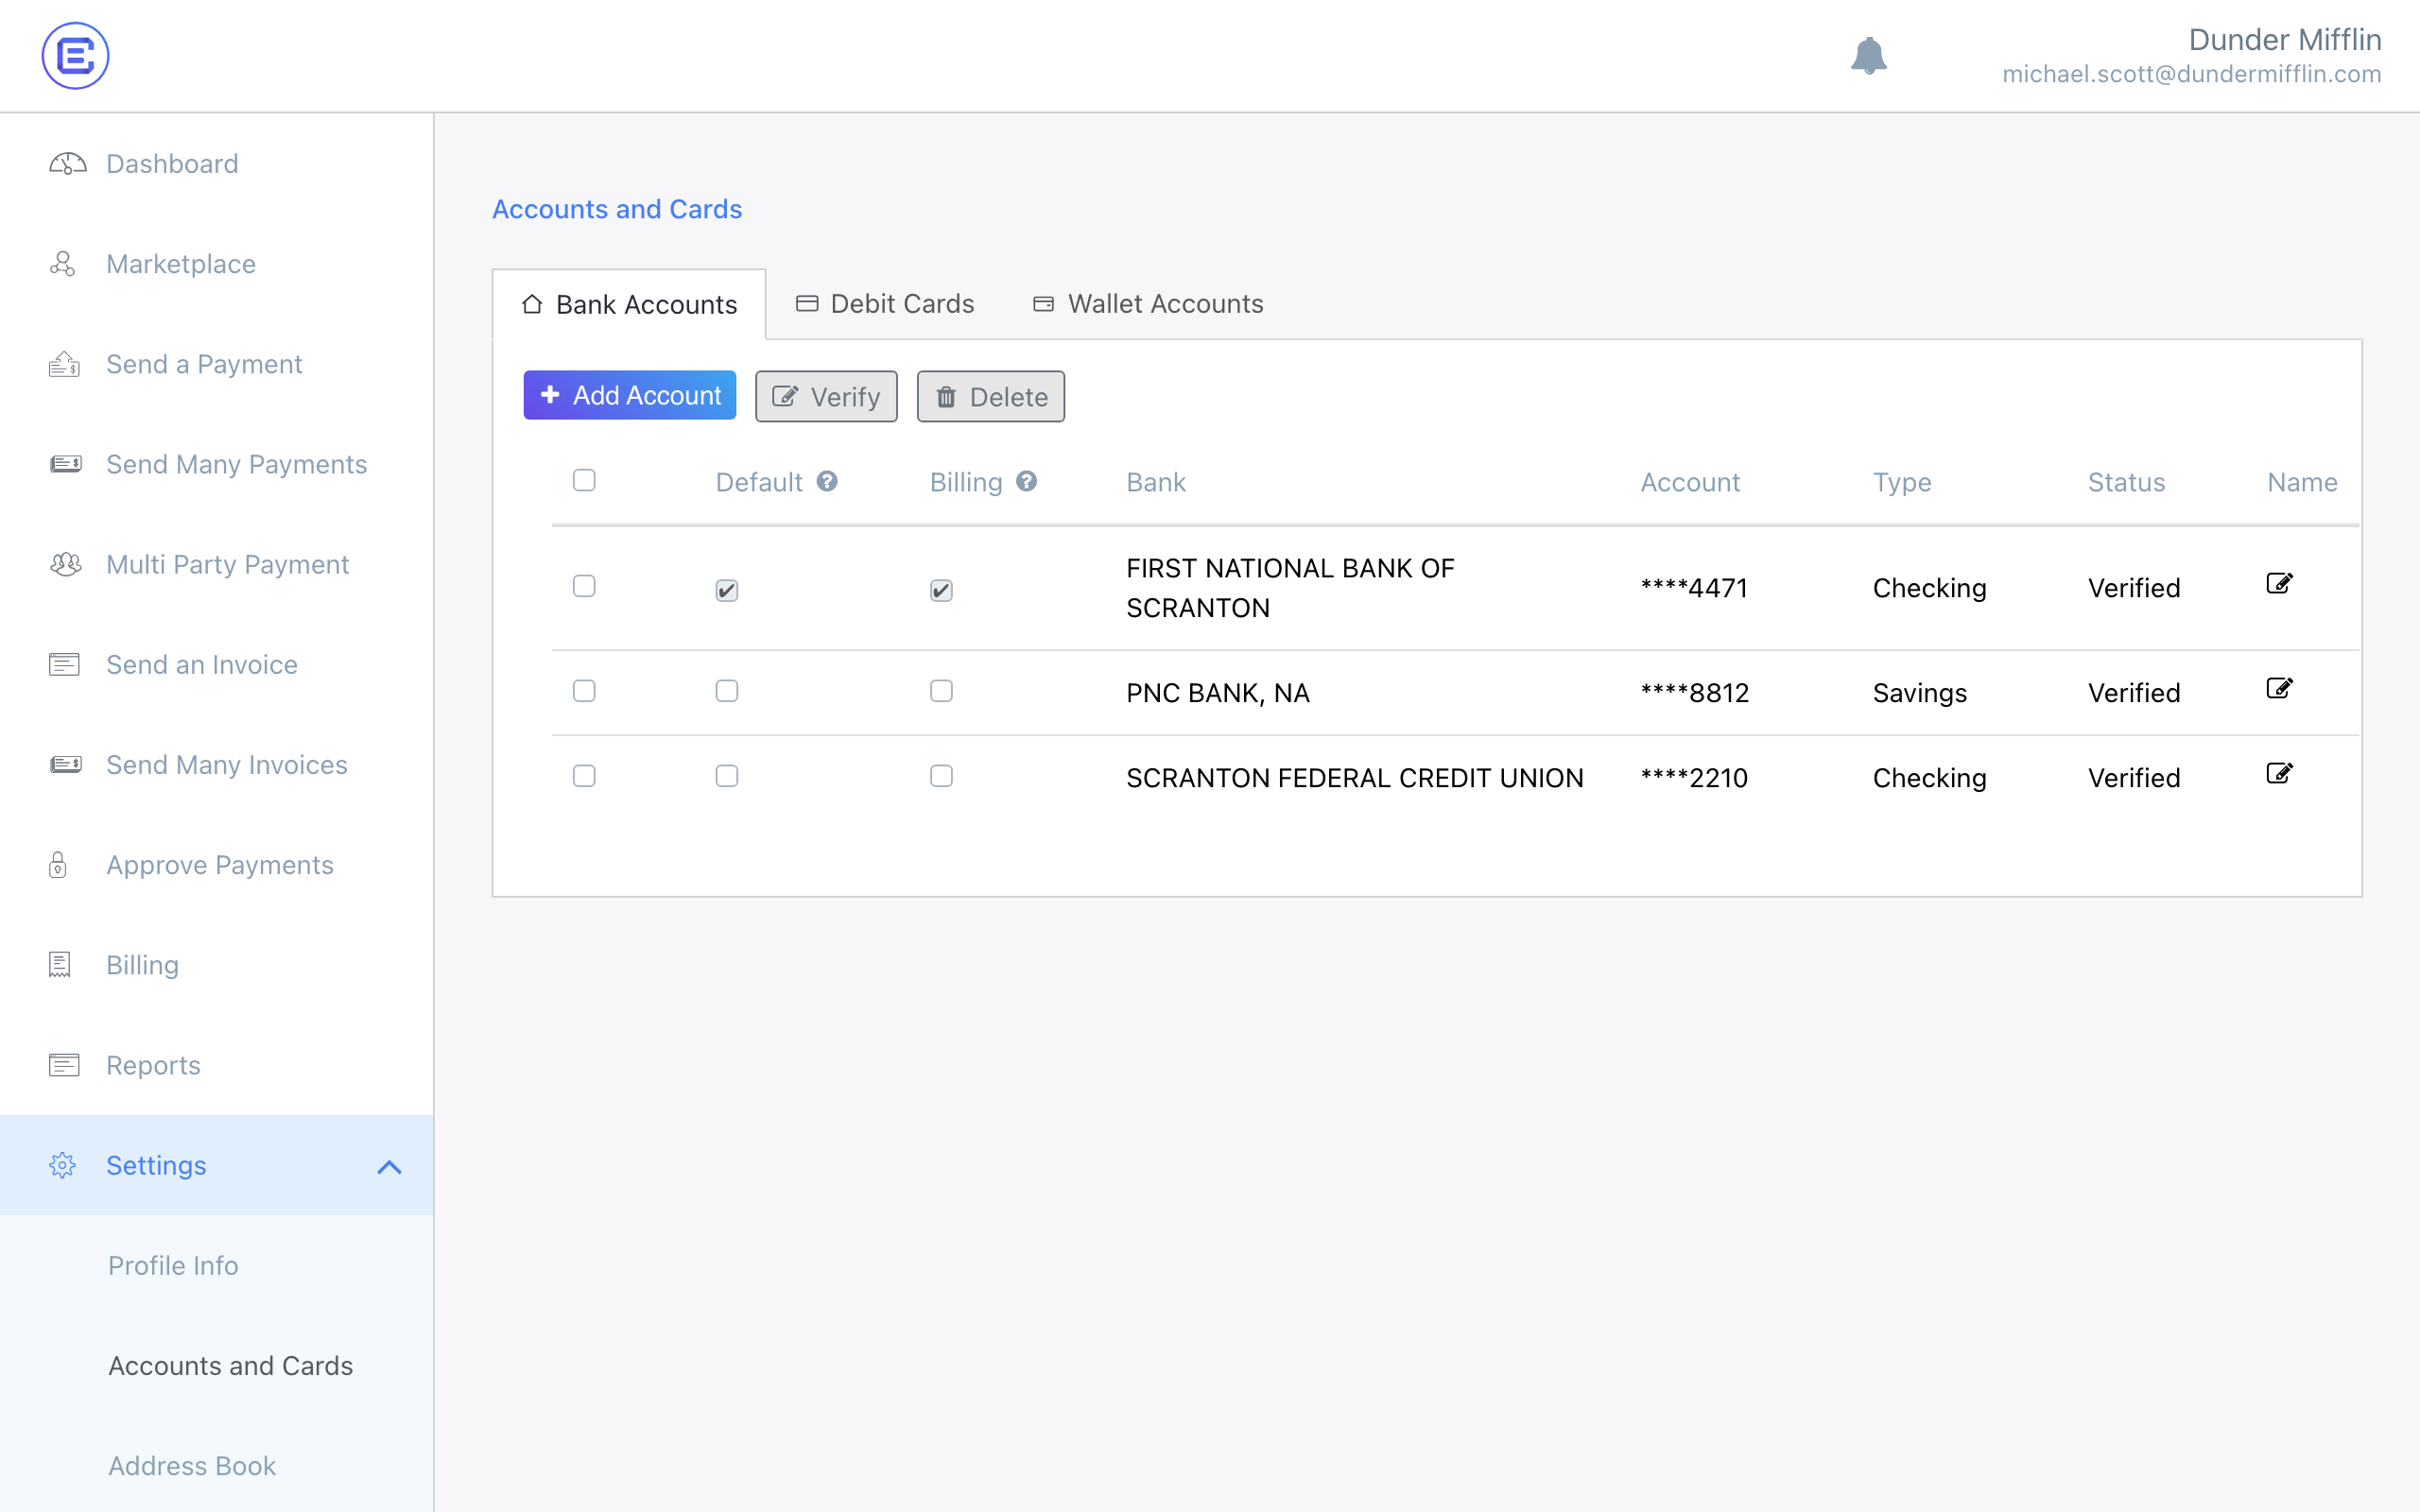
What it was: Previously Accounts and Cards — Five tabs including Bank Accounts, Debit Cards, Virtual Cards, Wallet Accounts, Zelle Accounts — each with its own table.
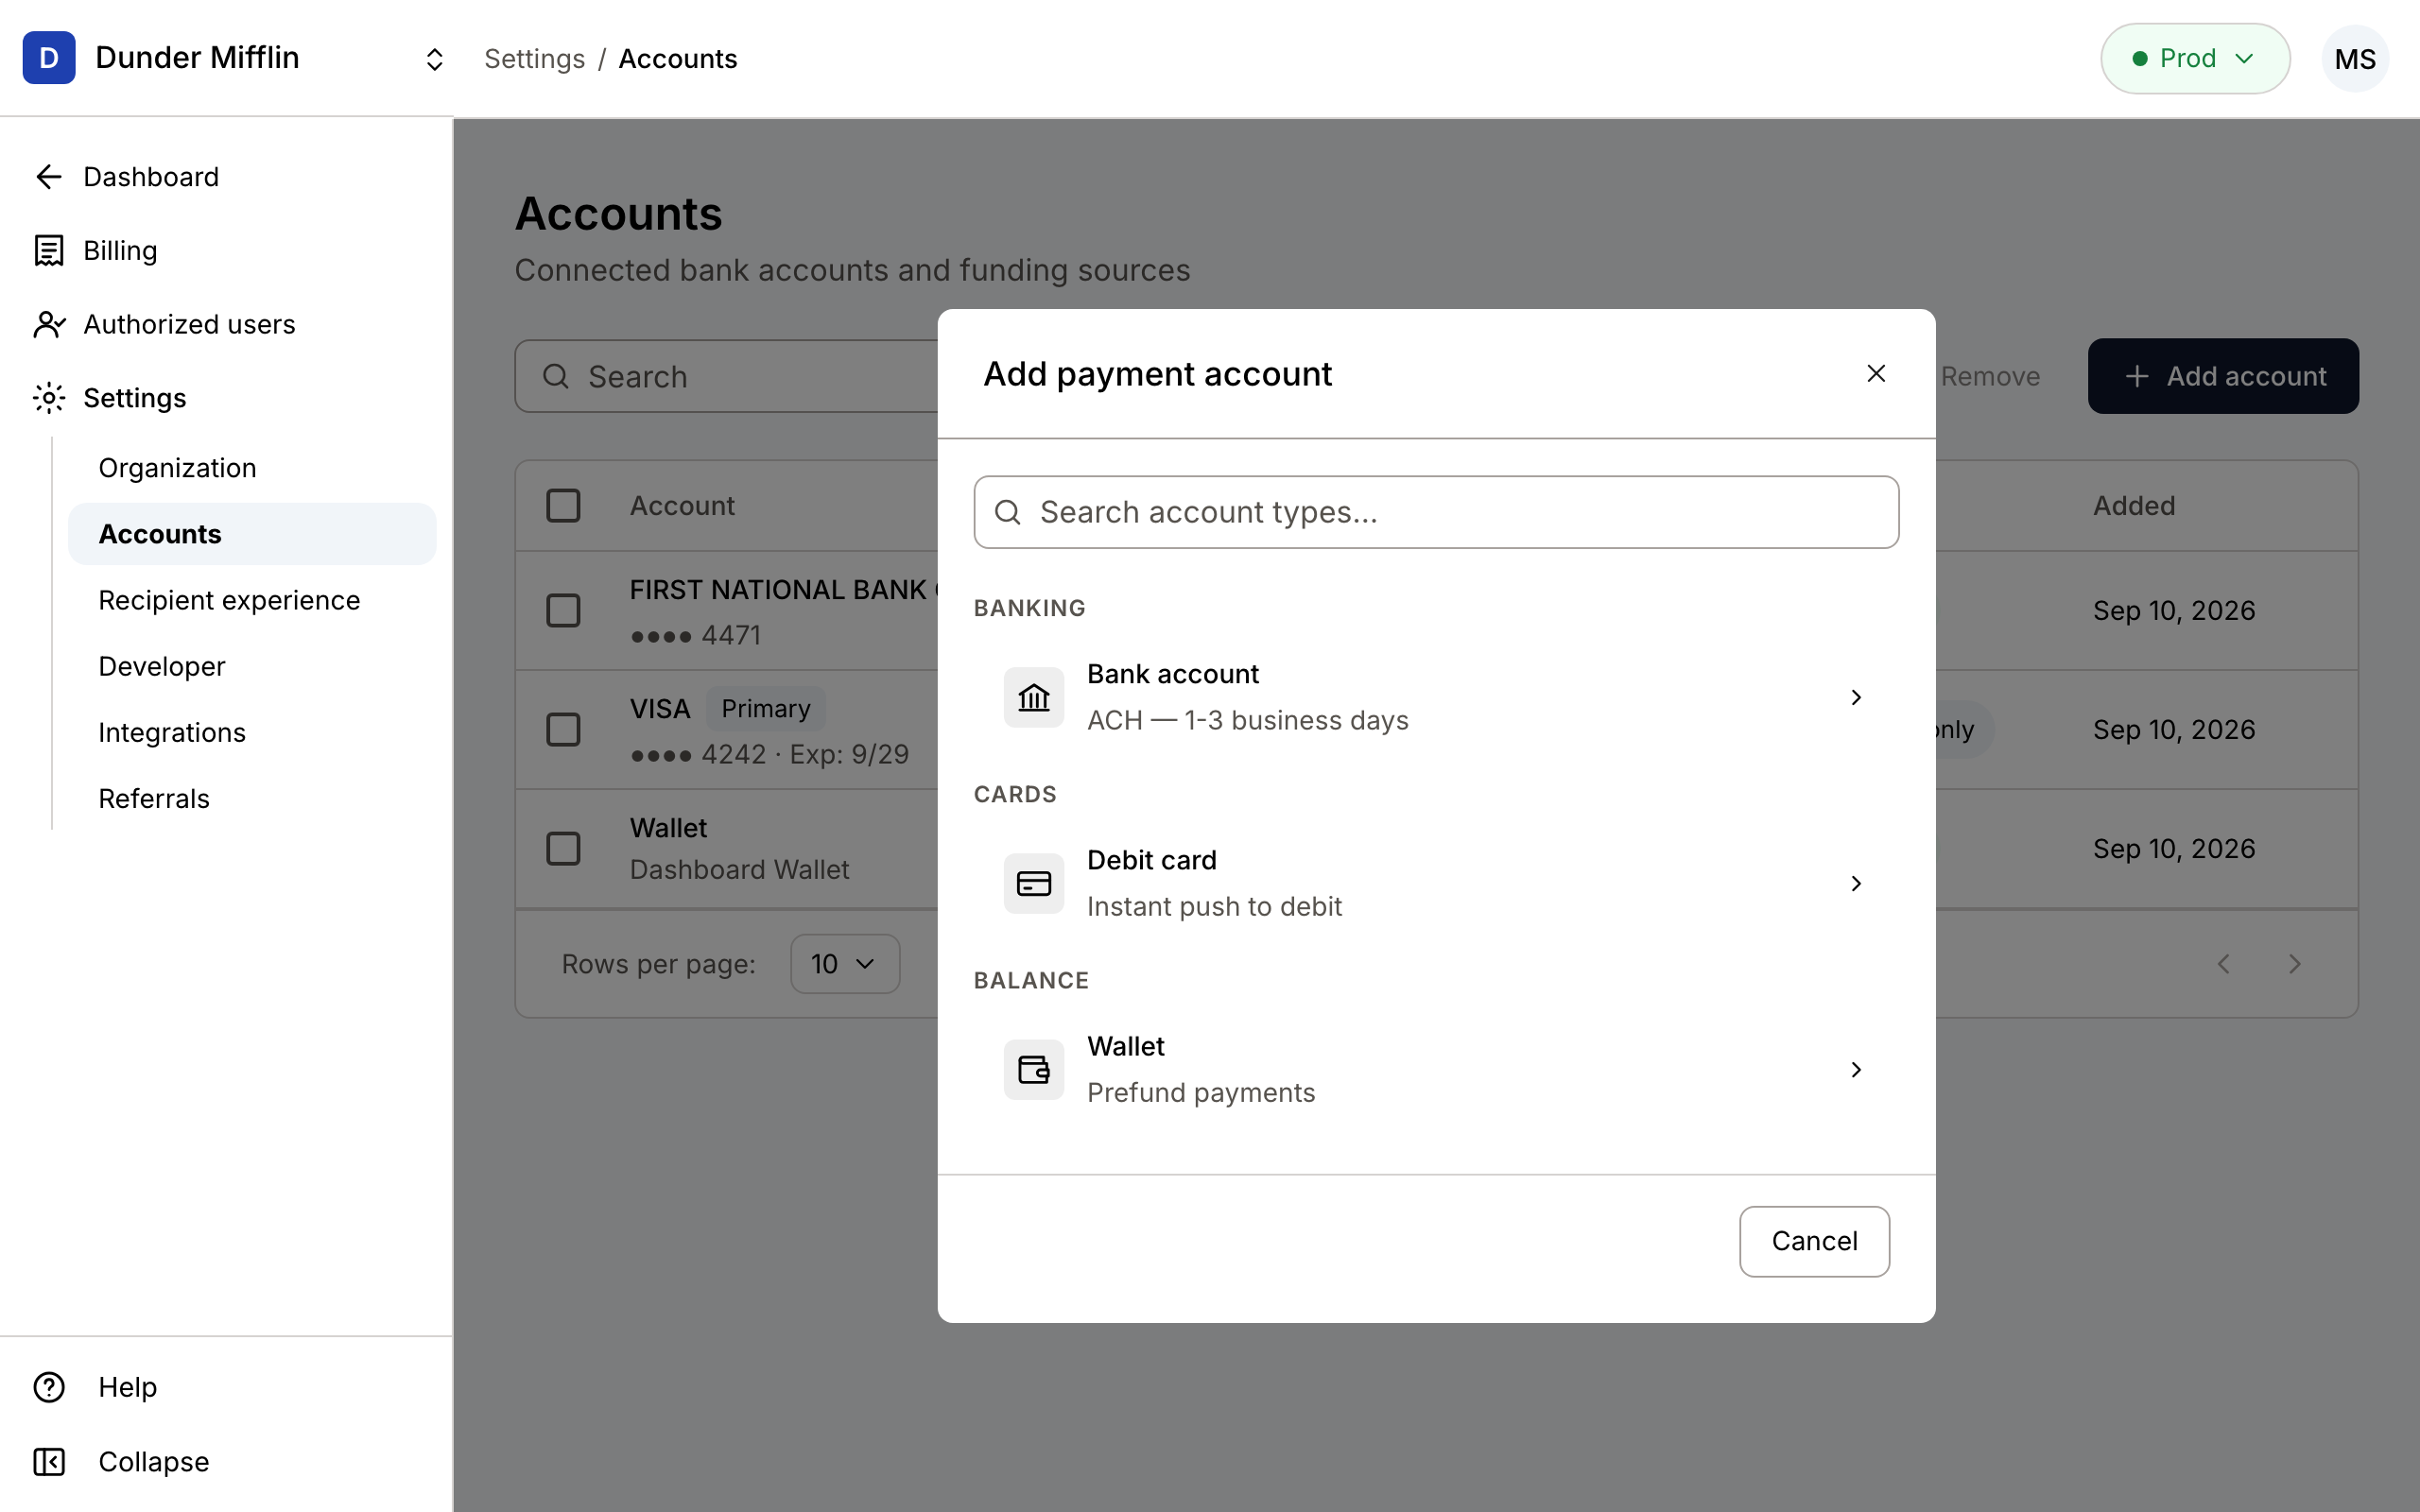
What changed: One list of connected accounts and funding sources, with type shown as a label on each row rather than as a tab. Adding an account is now a single picker, and wallets can be created directly from the dashboard — no integration work required.
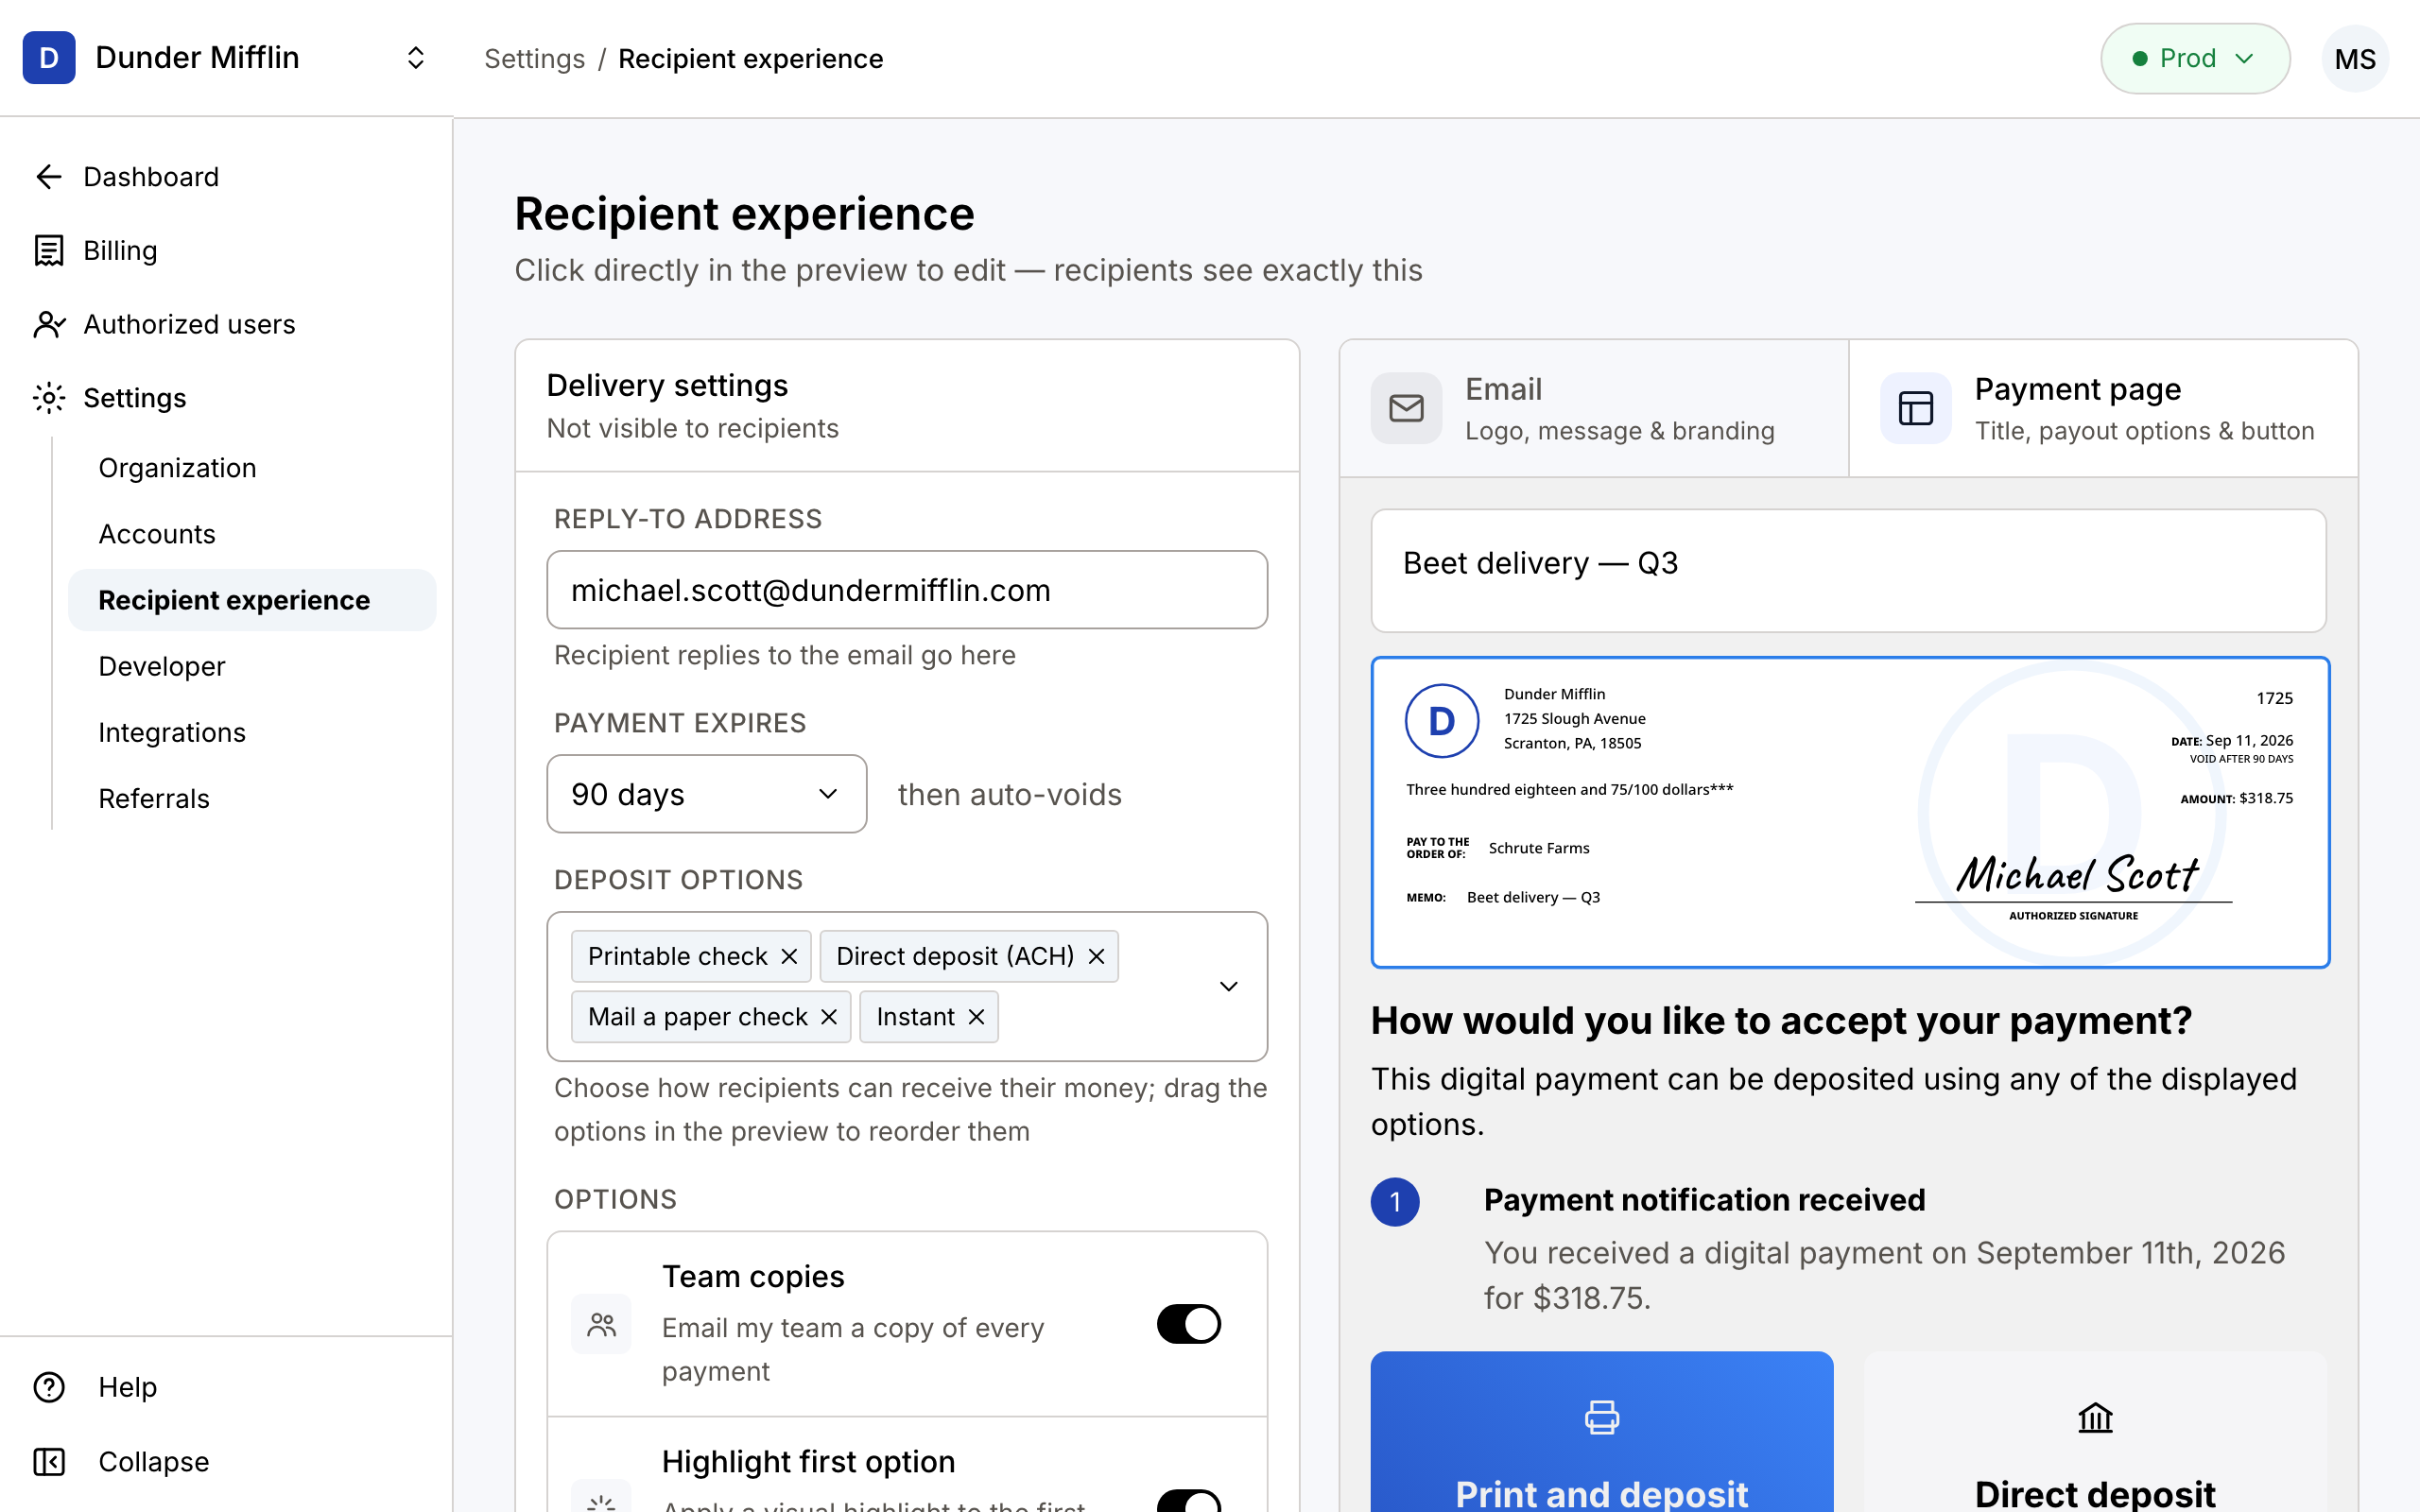
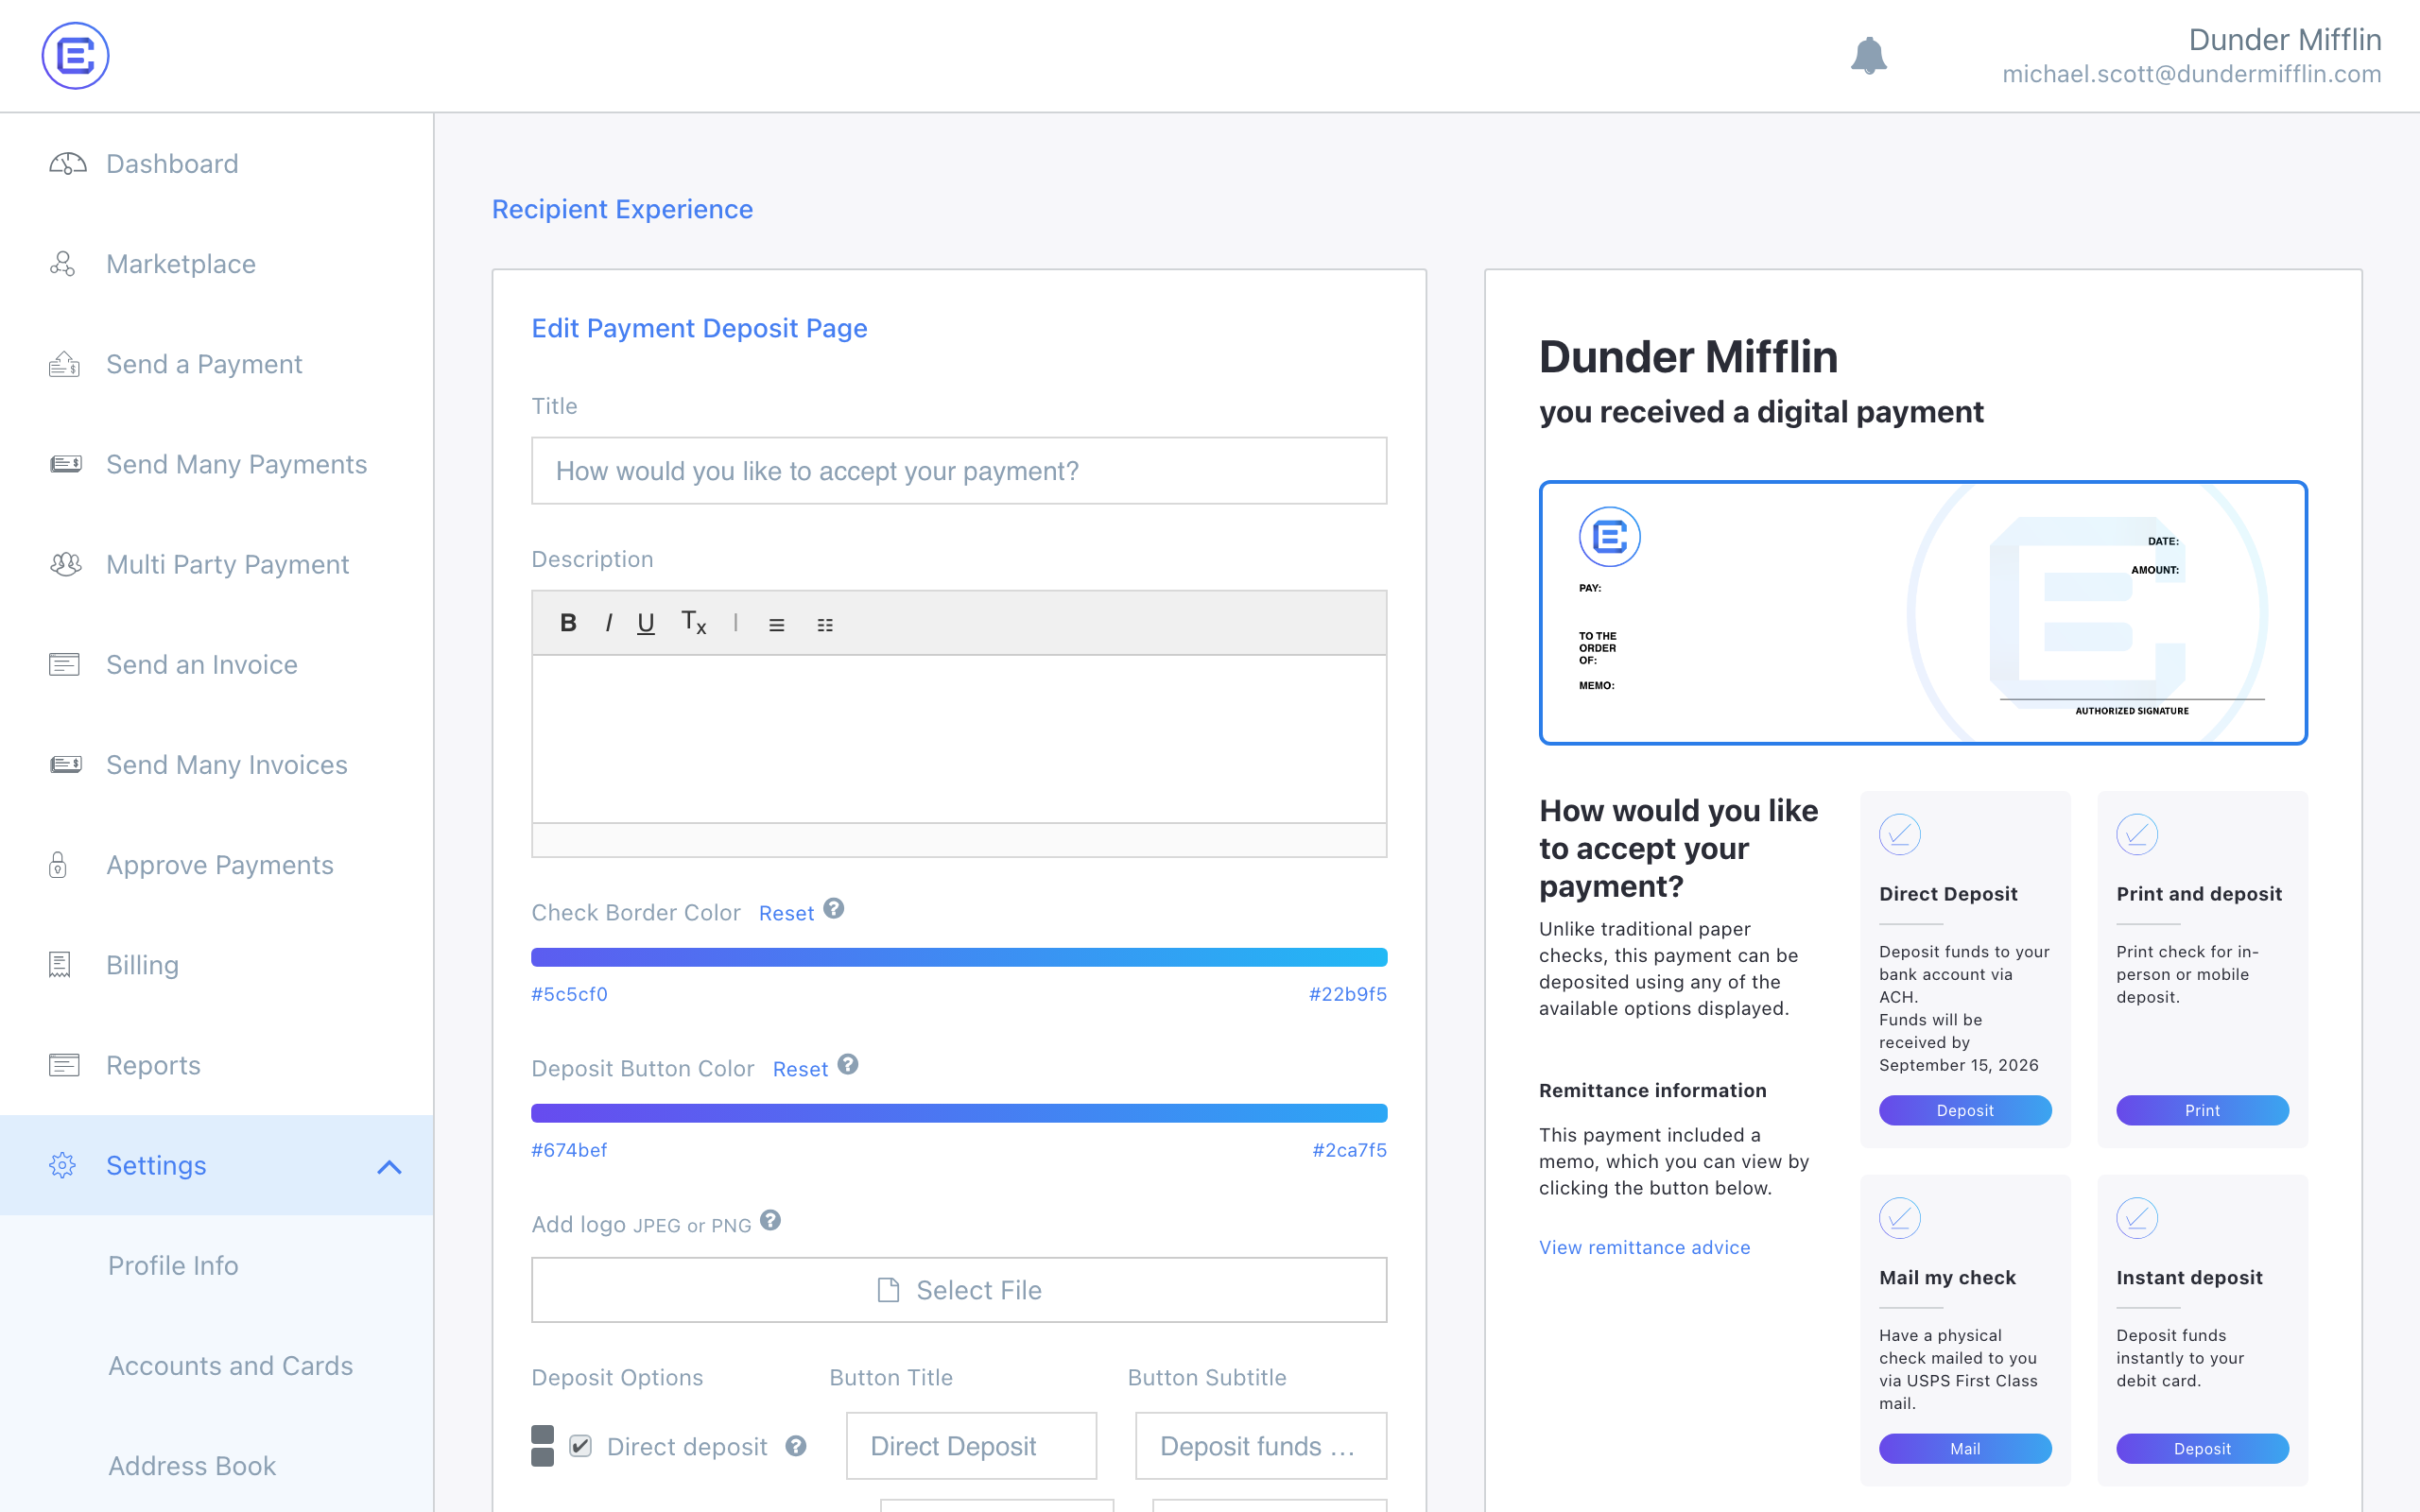
Recipient experience
What it was: Two separate pages, one for the payment page and one for the notification email, each with a long form on the left that updated a preview on the right.
What changed: Both now live on a single page and can be edited directly in a WYSIWYG preview. Click any text on the payment page or the notification email to change it in place, drag deposit options into the order recipients see them in, and set delivery details.