OAuth
Checkbook utilizes the OAuth 2.0 protocol to provide a secure and standardized way for third-party applications to access your Checkbook account data and perform actions on your behalf, without requiring you to share your direct Checkbook login credentials (username and password).
OAuth 2.0 is an industry-standard authorization framework that enables secure delegated access. It allows a user to grant a third-party application limited access to their resources on a service (like Checkbook) without giving away their login details. This is commonly seen when you allow an application to “Sign in with Google” or “Connect to Twitter.” More information on OAuth can be found here .
If you are a developer looking to build an application that integrates with Checkbook using OAuth 2.0, you will typically need to:
-
Register with Checkbook: Sign up with Checkbook to obtain a
client IDandclient secret. These credentials identify your application to the Checkbook authorization server. -
Implement the OAuth 2.0 Flow: Follow the steps outlined below to redirect users for authorization, exchange the authorization code for an access token, and use the access token to make API requests.
-
Handle Token Management: Securely store and manage access and refresh tokens.
Key Concepts
Resource Owner: The user who authorizes an application to access their Checkbook account.
Application: The third-party application that wants to access the user’s Checkbook resources.
Authorization Server: The Checkbook server that issues access tokens to the client after successful authorization.
Resource Server: The Checkbook API server, which hosts the protected user resources.
Access Token: A credential that the client uses to access protected resources on the resource server.
Authorization Code: A credential representing the resource owner’s authorization
Scope: Specifies the limits of access that the application is granted.
Authorization Code Grant Flow
The Authorization Code Grant is a common OAuth 2.0 flow, and here’s how it works with Checkbook:
Authorization Request
The user clicks a button or link in the client application (e.g., “Connect to Checkbook”). Next, the client application redirects the user’s browser to the Checkbook authorization server, https://app.checkbook.io/oauth/authorize, including the following 4 query parameters:
| Query parameter | Description |
|---|---|
| client_id | The client ID found in the Developer Settings page |
| redirect_uri | The URI where Checkbook will redirect the user after authorization, configured on the Developer Settings page |
| response_type | Set to code for the Authorization Code Grant |
| scope | One of the following values:check: the token can be used multiple times to send paymentssingle-use: the token can be used only once to a payment |
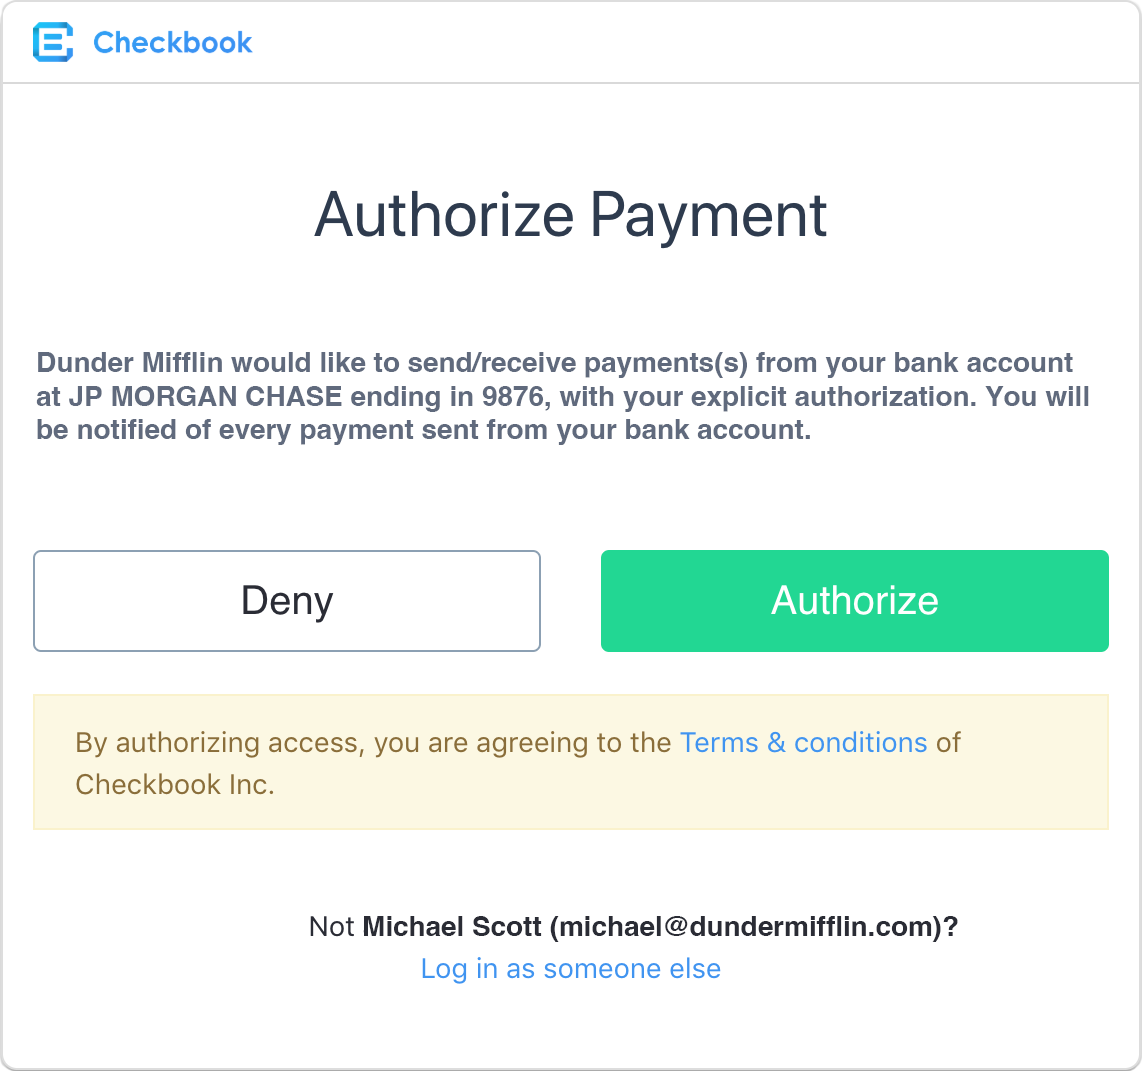
User Authorization
The user is prompted to log in to their Checkbook account (if not already logged in) and is presented with an authorization screen showing the permissions the client application is requesting. The user can select to grant or deny authorization.
Authorization Code
If the user grants authorization, the Checkbook authorization server redirects the user’s browser back to the redirect_uri provided by the client application, including an authorization_code in the URL query.
https://{redirect_uri}?code={authorization_code}Access Token Request
The client application sends a request to the Checkbook authorization server (using its client_id and client_secret) to exchange the authorization_code for an access_token.
| Query parameter | Description |
|---|---|
| client_id | The client ID found in the Developer Settings page |
| grant_type | Set to authorization_code for the Authorization Code Grant |
| scope | One of the following values:check: the token can be used multiple times to send paymentssingle-use: the token can be used only once to a payment |
| code | The authorization_code returned in the previous step |
| redirect_uri | The redirect URI found in the Developer Settings page |
| client_secret | Your secret key found in the Developer Settings page |
POST https://app.checkbook.io/web/v1/auth/oauth/token
Content-Type: application/x-www-form-urlencoded

client_id=313910200b834c009f62ae47feeee407&grant_type=authorization_code&scope=check&code=8hXMj1T9D36qL2uzb19s5OaNnkT6Vq&redirect_uri=https://dundermifflin.com&client_secret=dXbCgzYBMibj8ZwuQMd2NXr6rtvjZ8
Access Token
The Checkbook authorization server verifies the credentials and, if valid, issues an access_token to the client application.
{
  "access_token": "Nv6XB8OQ3IfT77Y9IknZqe87bFiF6Z",
  "token_type": "Bearer",
  "expires_in": 15552000,
  "refresh_token": "v0sRbFofMnKB2GmMyGnoOsot1VbpDU",
  "scope": "check"
}The access token will expire, and the refresh_token can be used to obtain a new access token without requiring the resource owner to re-authorize the application.
Resource Access
The client application uses the access_token in the Authorization header of its HTTP requests to the Checkbook API to access the protected resources:
Authorization: bearer {access_token}So for the previous example, the authorization header would look like:
Authorization: bearer Nv6XB8OQ3IfT77Y9IknZqe87bFiF6ZToken Refresh (Optional)
The client application can use the refresh_token to obtain a new access_token when the current one expires, without requiring the user to re-authorize. The URL accepts a POST request with the parameters:
| Request parameter | Description |
|---|---|
| client_id | The client ID found in the Developer Settings page |
| grant_type | Set to refresh_token |
| refresh_token | The refresh_token returned previously |
| client_secret | Your secret key found in the Developer Settings page |
POST https://app.checkbook.io/web/v1/auth/oauth/token
Content-Type: application/x-www-form-urlencoded

client_id=313910200b834c009f62ae47feeee407&grant_type=refresh_token&refresh_token=v0sRbFofMnKB2GmMyGnoOsot1VbpDU&client_secret=dXbCgzYBMibj8ZwuQMd2NXr6rtvjZ8
A successful request will return the JSON object with an access_token; the same as the initial response for getting the access token.